Using social media channels to optimise lead generation has proven to be an effective marketing strategy for many businesses. Facebook, for instance, provides the option of using an instant form to collect contact information such as name, email address, phone number and more from people who may be interested in your product(s) or service(s). The way Facebook LeadAds work is that when someone clicks on your ad, a form opens with the person’s contact information (name and email address) automatically filled in, based on the information and permissions they’ve shared with Facebook. This makes the entire sign-up process extremely convenient – one click to open the form and another to submit it. Like all Facebook ad types, LeadAds were built with privacy in mind – people can edit their contact information before submitting the form, and this information isn’t sent to the business until a person clicks submit.
How to use LeadAds in MarketingPlatform
You can easily transfer the leads you’ve collected on your Facebook form(s) into MarketingPlatform in a step-by-step process explained below.
Step 1: Log into MarketingPlatform.
Step 2: Edit the list where you want your leads to be stored.
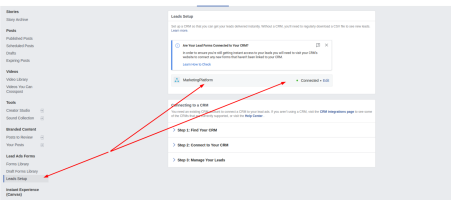
Step 3: Click the Connect with your Facebook account button.
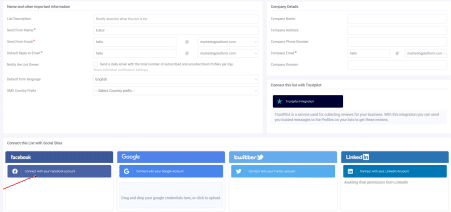
Step 4: Log into your Facebook (business manager) account (from MarketingPlatform), enter your credentials, and click Continue. After successfully logging in, from the dropdown menu you can choose your FB Pages and Ad accounts you want to use in the future.
Step 5: Click LeadAdsform configuration in the same place where you connected the list to your Fb account.
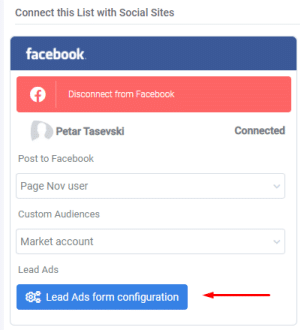
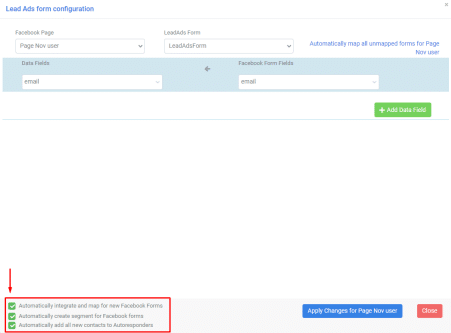
A window will open where you can select the Facebook page you want to use and the desired LeadAds form.
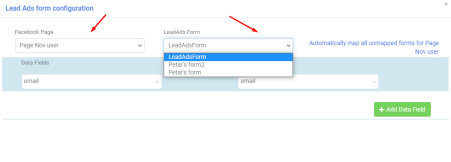
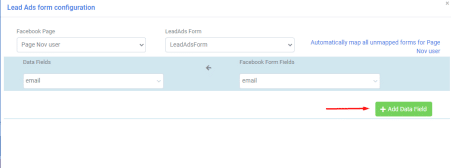
Step 6: Choose your LeadAds form and map the fields – email is mandatory on all forms. You can add/remove data fields by clicking the Add/Remove Data Field button.
Step 7: Once you’ve set it all up, click Apply Changesfor X Page.
Step 8: Scroll back to the top of the page and click Save and Close or Save and Continue if you still want to edit.
Note: Always save the list changes after any edits you make including LeadAds form configuration.
Now the connection between MarketingPlatform and your Facebook account has been completed. The profiles from the LeadAds form will be stored in the Profile List(s) previously synced with your Facebook account.
When everything is connected properly, you can now segment on the profiles you get from LeadAds forms.
For this, you go to Segments > Create Segment and select the list you want to segment on. In the Filter Profiles box choose Profile Source > Is > Facebook and then choose the desired form.
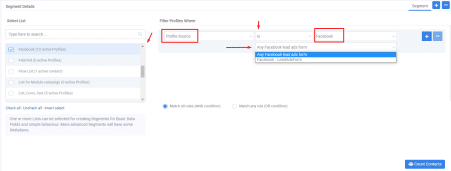
You can always count the profiles by clicking the Count Contacts button in the bottom right corner before saving and closing the segment.
Tip 1: You can select automatic segment creation (along with automatic mapping and adding profiles to autoresponders) for all new forms in LeadAds form configuration. This, however, is optional.
Tip 2: If you want to check if the form you created is working properly, go to your Facebook account’s Publishing Tools > Forms Library > Preview the form you are testing.
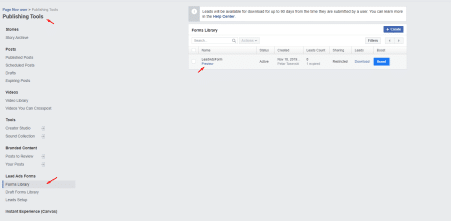
A new pop up window will appear where you can enter the email address you want to test or add to the chosen list. After adding the contact, go to Lists > View Profiles, where you should find the contact you’ve added.
Tip 3: When testing with the LeadAds tool after adding 1 contact you will need to Delete Lead before adding/testing with a new contact (that is simply how the tool works).
If for whatever reason you are not getting any new leads on the connected list, please check the following:
- That you’re logged into Facebook via MarketingPlatform.
- That you’ve enabled all permissions on What is MarketingPlatform allowed to do when logging in via our application page.
- That you’re connected to MarketingPlatform.
Useful links:
Connect Your CRM System to Facebook
User Permissions in Leads Access Manager
Other ways to use Facebook in MarketingPlatform
Except for lead generation, there are other ways you can use Facebook inside MarketingPlatform – Audiences and Posting.
Audiences
MarketingPlatform allows uploading lists or segments to Facebook as audiences. This can help you with better social targeting by using the same audience or creating lookalike audiences. Our wiki article on how to use Facebook Audiences will provide you with better insight into this feature.
Posting
MarketingPlatform also allows publishing newsletters as Facebook posts. This option is selected inside the campaign builder. This is our detailed guide on how to use the feature.

