To engage your profiles and encourage them to interact with you, sending out a birthday email (possibly including a discount code), is relevant.
To create a trigger, go to “Automated flows” and choose “Triggers” in the menu:

Upon entering the view, click the blue button “Create trigger”. Afterward, a beam will appear on the bottom of the page.
The first step is to create a meaningful name for the trigger, to help you identify it later on – i.e. if you’re creating a flow that should be based upon whether or not this trigger has been activated. Click on next when you’re ready.

We’re now going to determine what the trigger should do. We have different options but for this scenario, we should send out an email campaign.
Choose the campaign and click on next.
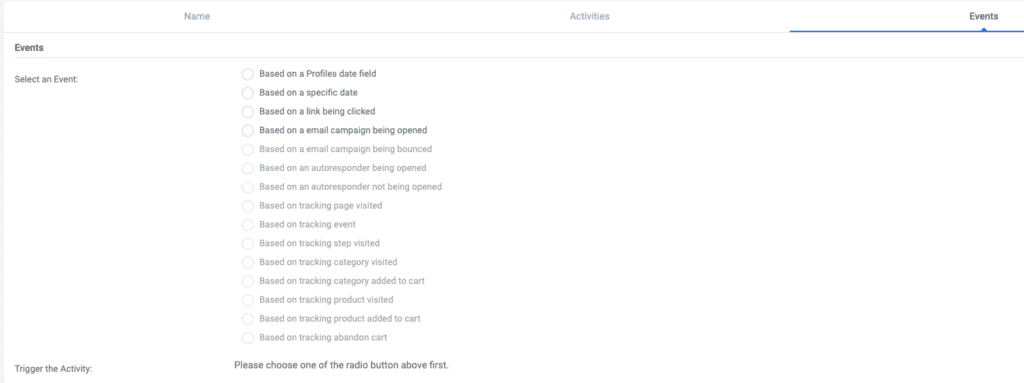
Next, you will need to determine based upon which events the trigger should be fired.
If the option you’re looking for is greyed out, please, reach out to support. There will be some areas that need to be set up.
For this scenario, we want to send out the email campaign on, before, or after a profile’s birthday. Therefore, the option “based on a profile’s date field” should be chosen.
When this option is selected, you will have to choose what list the date field is on. Afterward, you will choose what date field should fire the trigger. In this scenario, the date field would probably be named “Birth Date”.
When this selection has been made, new options will be available at the bottom of the page.

Here, you should choose whether the trigger should be fired on, before or after the date. “The date” can also be changed to either the next anniversary of the date or every anniversary of the date.
In this case, I’ve made the following options:

This will fire the trigger and thereby send the email campaign to every relevant profile one week before their birthday.
Click next.
We’ve now reached the final step before activating the trigger. Here, you’ll input all of the information your profiles would need: send from name and email, and what email address should be used for replies.
Google Analytics can help you with tracking, this is active as a default. You can choose what activity time the trigger should, i.e. if you don’t want to send the campaign out in the middle of the night. Tick the checkbox, and you can choose a time period when the trigger should send out the email campaign.
Finally, you have the option to only send the email campaign to (a) certain segment(s), i.e. VIP profiles.

When you’re done setting up the trigger, click on “Save & Activate”, or “Save” if you want to continue working on it.

