Using feeds from your web content is a great way to customize the email campaigns you send to your subscribers with a constant update of information without having to repeatedly (and manually) update the campaign content such as in case of price changes or new products in your web shop. By using feeds, your newsletter content will always be synchronized with your web content.
To be able to use feeds in the Email Campaign Builder, you must first load your feed URL into the Feed Cache. You can find information on how to do this here.
How to insert a Feed Block
To start building your Feed Block, you must first insert a grid and/or elements that will later be converted to a Feed Block. You can design the look of your elements before or after transforming a grid into a Feed Block.
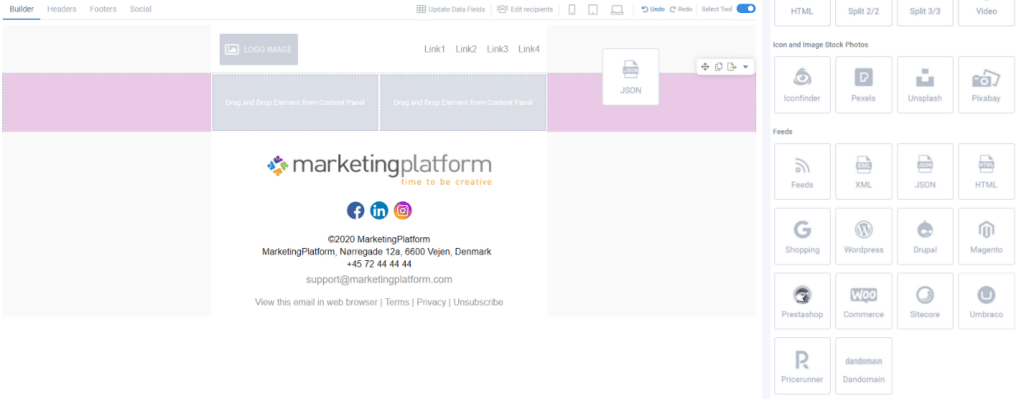
From the Content tab under Feeds, select the type of feed and drag and drop it into the grid (see image below). On the right side, a new panel with feed settings will open.
1. Setup
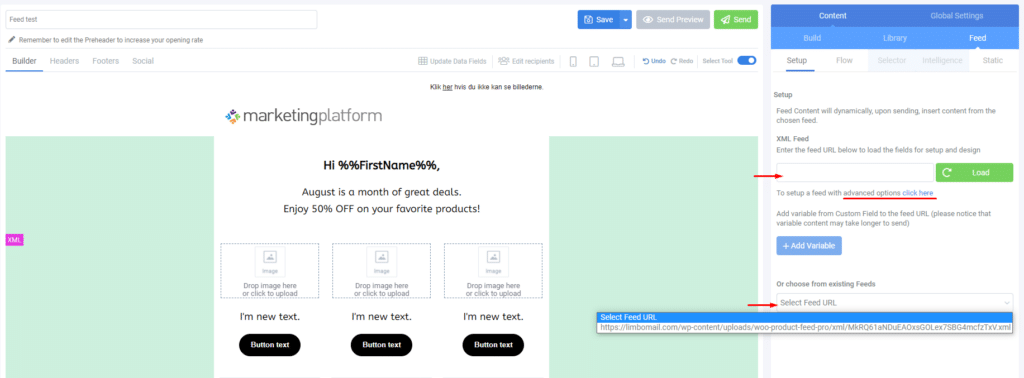
Under the Setup tab, you can manually insert the URL of your feed or alternatively, select an existing one if you have previously saved it in Feeds and Sitemaps. Inserting/choosing and loading your feed URL will load the feed content fields for setup and design. Below, you also have information on the last time your feed cache was refreshed.
If you want to apply additional settings for your feed like login information, pagination, or set the feed cache frequency, you can do all of it in the advanced options.
Also, if the text (e.g., product description) is too long for the text element, you can abbreviate the default 500-character limit in the text element properties.

Setting up Feed Variables
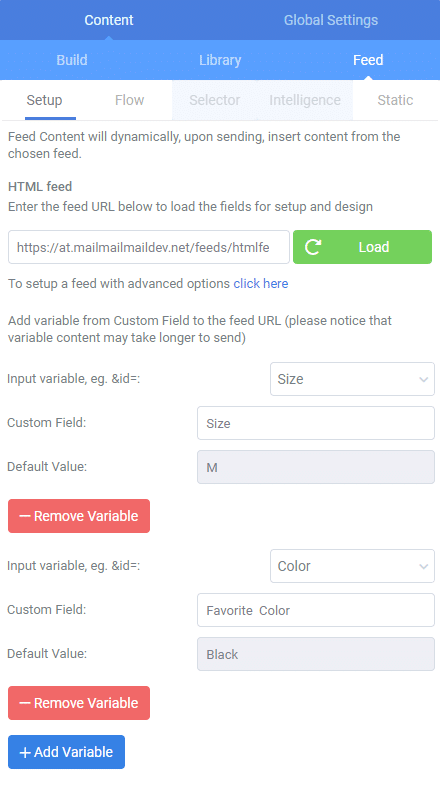
In case you are using a feed with variables, you can set it up by clicking on +Add Variable. Please note that this option will be available only if your feed contains the necessary variable attributes.
In the example below, the product feed contains variables – variables being the size and color of clothing items.
Setting up variables will enable the system to target each subscriber with relevant products based on their interest (in this case, the subscriber’s size and favorite color). Thus, subscribers with info about their size and favorite color will receive items from the product feed accordingly and subscribers who lack this info will receive items designated as default (e.g., default value for color – black, default value for size – M).
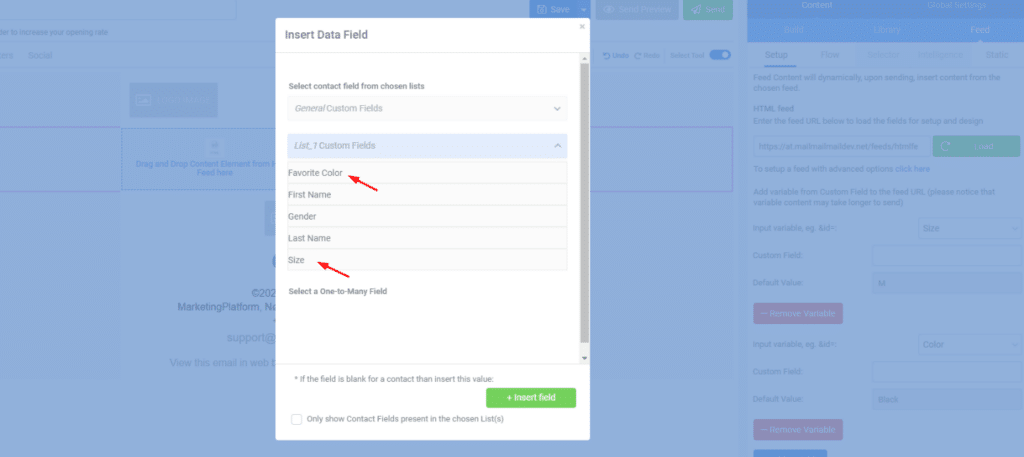
Once you have selected the variables, you need to insert the custom field linked to that variable. This can be done by clicking on Custom Field and selecting the corresponding data field (see images below).
How to insert content elements into a feed
Once your feed is loaded, you can continue and insert the feed content elements.
There are various content elements that you can insert into a Feed Block (see image below). Just drag and drop the desired elements into the main area of the Builder on the left.
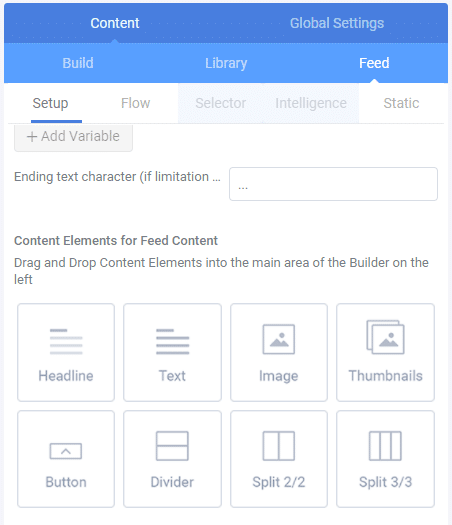
Feed Content Fields
Under the Setup tab, you can select the Feed Content Fields that you wish to include in your Feed Block. These fields represent all the information that your feed contains about your products, such as name, image, product ID, product description, price, etc.
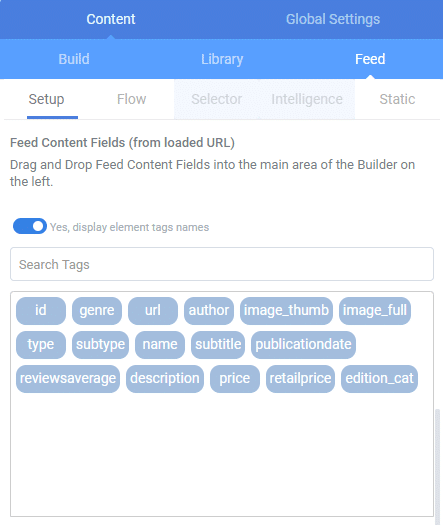
To insert a field, just drag and drop it onto the corresponding content element. Please note that you should always apply fields corresponding to the inserted content element in your Feed Block (image-related fields to image element, name/description/price to text elements, etc.). Otherwise, the system will not be able to associate the selected field with the content element.
Set Link
Setting links to the elements can be done via the drop-down menu Set Link, from which the corresponding URL field can be assigned. The link tag can be assigned to selected items or to all of them, which means you can choose to have only the image or button linking to the product page, or you can have each item in the Feed Block linking to it. To insert the link on only some of the elements, uncheck the Enable link on all Elements button, which is ON by default.
Choose keytag
Depending on whether you want to use the Selector Mode or the Flow Mode, you can choose to select a keytag.
To enable the Selector Mode, select your keytag from the dropdown menu under the Setup tab, as shown in the image below. This will allow you to filter items from your feed by the selected keytag (see Selector).
Deselecting the keytag option will enable the Flow Mode (see Flow).
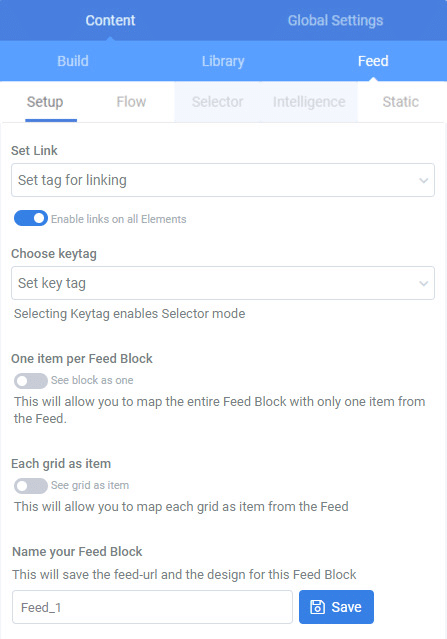
One item per Feed Block – selecting this option allows you to map the entire Feed Block with only one item from the Feed.
Each grid as Item – selecting this option allows you to map each grid as an item from the Feed.
You can save your Feed Block at the bottom of the page, which subsequently saves the name and design of the Feed Block. Once saved, the Feed Block will be available in your Library under Intelligent Modules/Content Feed Blocks.
2. Flow
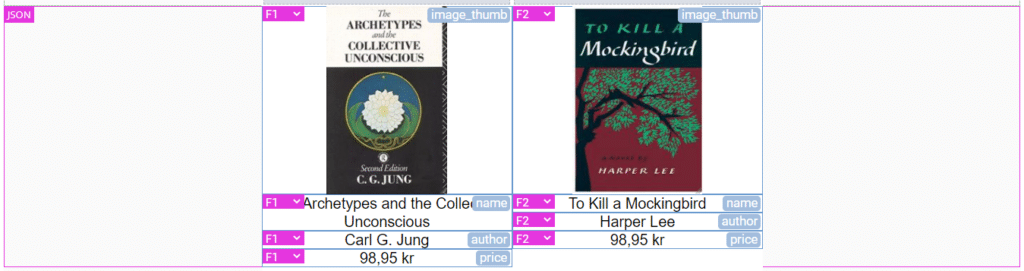
Under the Flow tab, you can define the number of items that you wish to be displayed in your Feed Block. Regardless of how many items you have initially placed in your Feed Block, the system will automatically duplicate positions in the grid, so the requested number of items is shown (see image below).
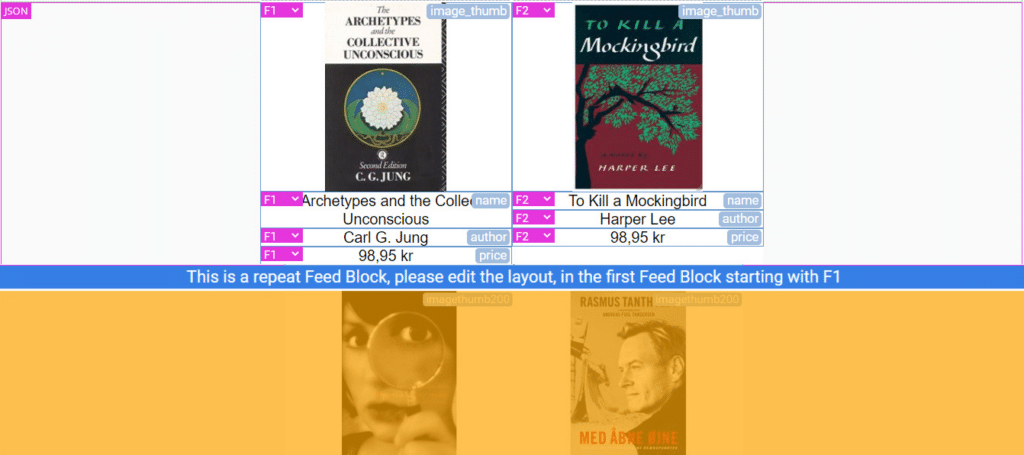
F1, F2, F3, …, are used to denote the ordinal number of the item as listed in the feed. E.g., F1 indicates that the first item from the Feed is displayed in the Feed Block. In case you are using filtering options to filter specific items from your feed, then this would be the first item listed in your feed that fulfills the filtering conditions/criteria you have defined. You can always change which item will be displayed in the Feed Block, by clicking on the ordinal number and selecting the desired one.
In case you are using the Selector Mode, the notation of the order of items will be s1, s2, s3, …, respectively.
Define filters
One of the most useful options available in Flow Mode is the possibility to apply filters and filter your feed content depending on the chosen criteria.
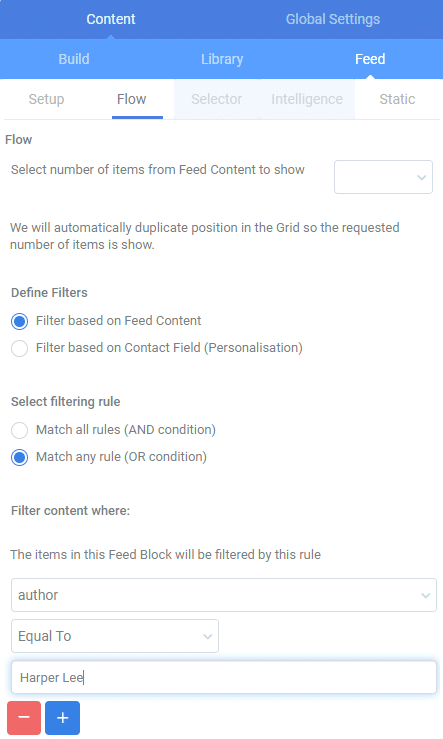
Filter based on Feed Content
This is a standard option that enables you to apply simple filtering rule(s) and filter items that match the rule(s).
You can apply more than one filtering rule and select whether you want to filter for items that match all rules you have defined or any of the defined rules (see example below).
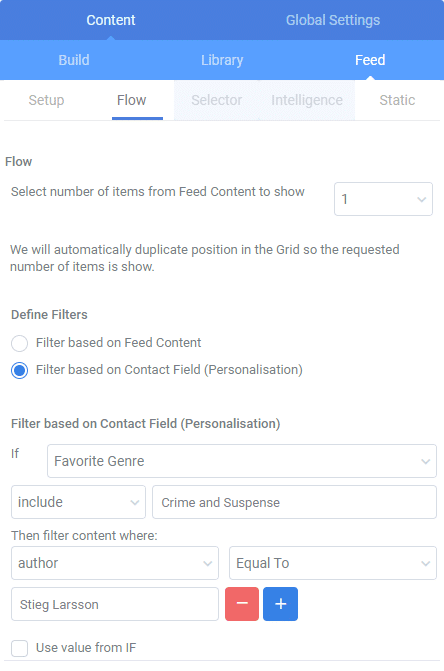
Filter based on Contact Field (Personalisation)
The filter is practically based on a conditional statement (IF-THEN), which the system will use to filter the content that will be displayed depending on a certain condition that you have defined for the selected contact field(s), as shown in the example below.
3. Selector
Selector Mode will be available if you have previously enabled it by selecting a keytag under the Setup tab.
This mode is used in case you want to filter and search for items from your feed by a selected keytag (e.g., author). This will allow you to have an overview of all the items from your feed by author, as well as search items by author in the search box, as shown in the example below.
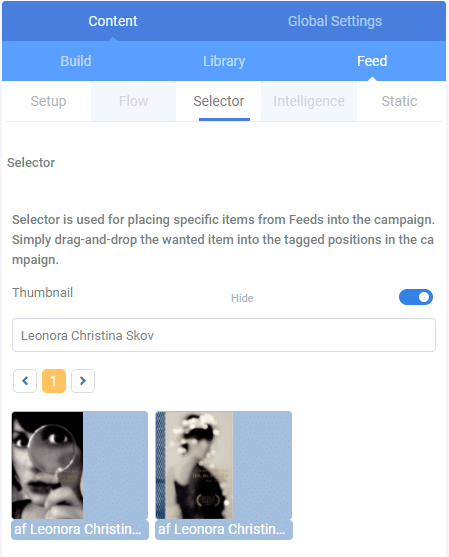
This is a great way to organize the feed content that you see, which will allow you to select wanted items from your feed more easily. To insert an item, simply drag and drop it onto the tagged position in the Feed Block.
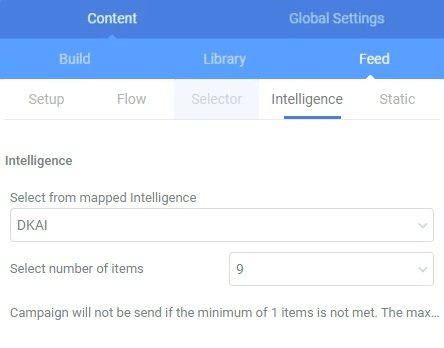
4. Intelligence
This feature will be available in case you are using AI (Artificial intelligence) to track subscriber activity. In this case, your feed content will be filtered per subscriber based on his behavior and activity (click/open history, purchase history, transactional data from OTM, etc.). As an output, the AI will be generating recommended products for each subscriber. This will allow you to target each subscriber with more personalized feed content based on their activity.
In order to use this feature, you must have previously set up Tracking and mapped your AI in the system. To insert AI data, just select it from the list of mapped intelligence and select the number of items that you wish to appear in your Feed Block.
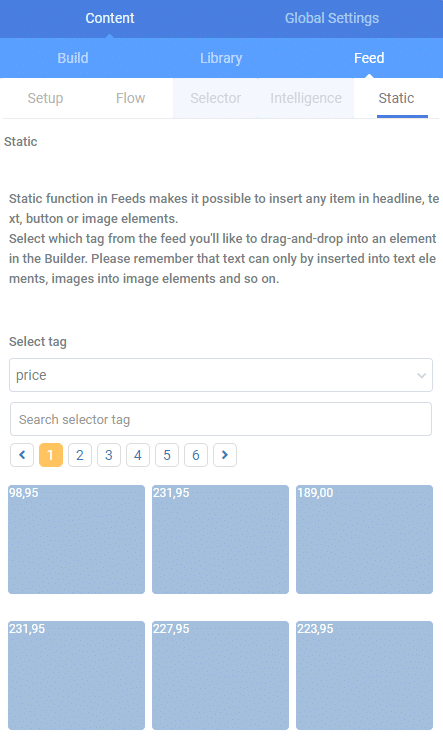
5. Static
This option enables you to insert static elements into your Feed Block.
If you want to insert any elements that you do not wish to be updated with your feed like the rest of your content, you can do it by selecting the corresponding keytag and simply dragging and dropping the desired item onto the tagged position in the Feed Block.
If you want to use Dynamic Blocks with feed, please note that you should first insert and define your Dynamic Blocks prior to inserting your feed. Otherwise, it will not be possible to insert your Dynamic Blocks once you have loaded the feed.
In case you want to remove your Feed Block, just click on Remove Intelligence in the Feed Block options menu (see image below).

To read more about Feeds, please refer to the following articles:


