What if you want to send different content to different audiences and target them with more personalized content? Imagine sending the same newsletter to your entire contact list, but one in which the recipients will receive a customized version that matches their interests and preferences.
It may sound complicated, but that is not the case at all. It is easy to set up and work with Dynamic Content on a daily basis.
1. How to use Dynamic Content in Email Campaigns
Dynamic Content is content that changes according to the individual recipient. Instead of sending many different campaigns to different segments, dynamic content can replace parts of your newsletter more intelligently. By using dynamic content, you can target your subscribers based on the segment they belong to and send them more relevant and personalized content which will be inherently more effective and engaging than sending them a general one.
As Dynamic Content is based on the subscriber’s unique data, interests, and behavior, the first thing that you need to do is create segments.
Data-based segmentation can be created on any data you have on your clients including basic demographic data (age, location, gender, etc.), preferences/interests (favorite store, favorite book/movie genre, etc.), and similar, or deep data such as last purchase, purchase value, coupon code, etc.
Behavior-based segmentation is made on customers’ activity in campaigns (opens/clicks), or on the website (most visited pages, categories/products, etc.)
Once you’ve planned your strategy and created your segments accordingly, you can continue and insert the dynamic content in your email campaign.
2. How to insert Dynamic Content in Email Campaigns
You can include Dynamic Content in your email campaign by inserting Dynamic Blocks that will correspond to the segments that you have created.
Access the Email Campaign Builder and start by adding the desired grid. Dynamic Blocks can be inserted anywhere in your email campaign, including the header and footer.
To insert a Dynamic Block, click on the grid options menu (see image below) and select Dynamic Block.

Add your Dynamic Blocks one by one by clicking on the “+” sign (see image below). You can also add/remove Dynamic Blocks by accessing the Properties tab.

Setup
Under Dynamic Content Module Settings, you can set up which segment should receive which Dynamic Block(s). The setup should be done individually for each of the Dynamic Blocks that you have added.
Please note that the “DEFAULT” block is inserted automatically and will be sent to profiles that do not match any of the segments i.e., criteria defined for your Dynamic Blocks. Thus, profiles that do not match any of the Dynamic Blocks that you have created, will receive the content from the “DEFAULT” Dynamic Block.
As for profiles matching multiple Dynamic Blocks, you can choose whether you want to send these contacts the content from all matching blocks or only the content from the first matching block.
At the bottom of the Setup tab, you must name and save your Dynamic Content Block. Please note that you need to add content to your Dynamic Block and select the corresponding segment/segmentation rule before saving it. Otherwise, you will not be able to save it. Once saved, the Dynamic Block will be available in your Library under Intelligent Modules/Dynamic Content Blocks.
Properties
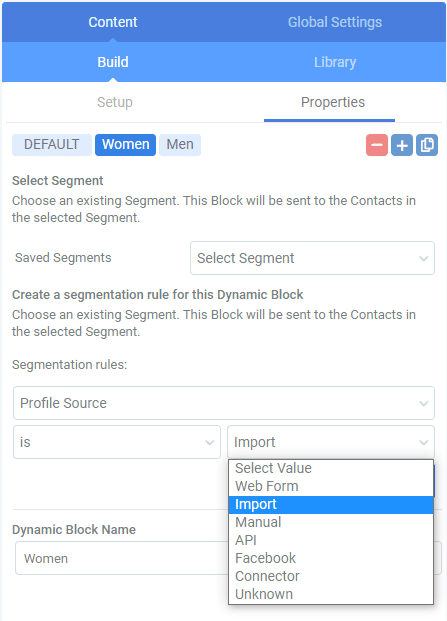
To define the content for your Dynamic Blocks, access the Properties tab on the right and select the corresponding existing segment. The Block will be sent to the contacts belonging to the selected segment.
Aside from selecting an existing segment, you can apply segmentation rule(s) directly in the Properties tab, based on existing data fields in the platform. You can also select a segment and filter it further by applying additional segmentation rules, e.g., filter by profile source, as shown in the image below.
Please note that the “Edit Recipients” option in the Builder will be unavailable and once you have selected your list/segments you cannot change them afterward, due to the fact that you cannot change the applicable data fields, as your dynamic content rules are based on these data fields.
In the upper right corner, you also have the options to add/remove/copy a Dynamic Block.
Don’t forget to name your Dynamic Block at the bottom of the Properties tab and save it in the Setup tab.
Build
To add content to your Dynamic Blocks, click on the Build tab and add elements for each of your Dynamic Blocks.
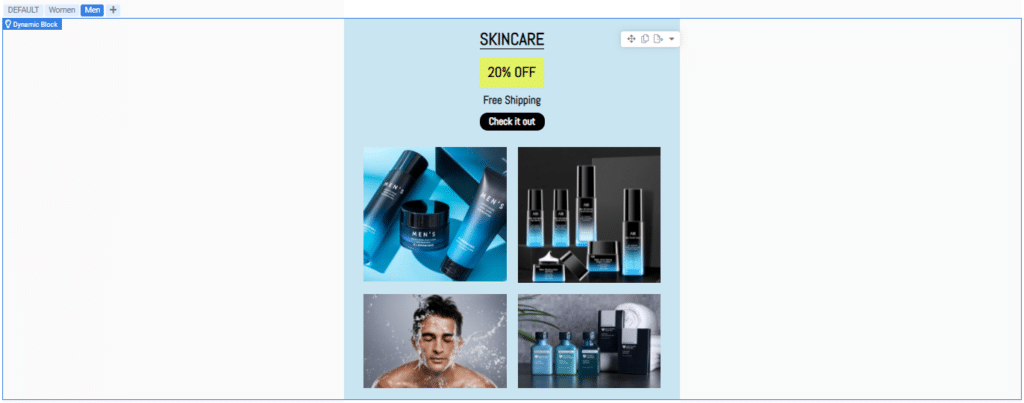
In the example given below (of a clothing webshop), segmentation is based on the data about the type of apparel that subscribers are interested in, and two segments are created accordingly.
Items intended for subscribers interested in women’s apparel are inserted into the first block “Women”. Respectively, items intended for subscribers interested in men’s apparel are inserted into the second block “Men”.

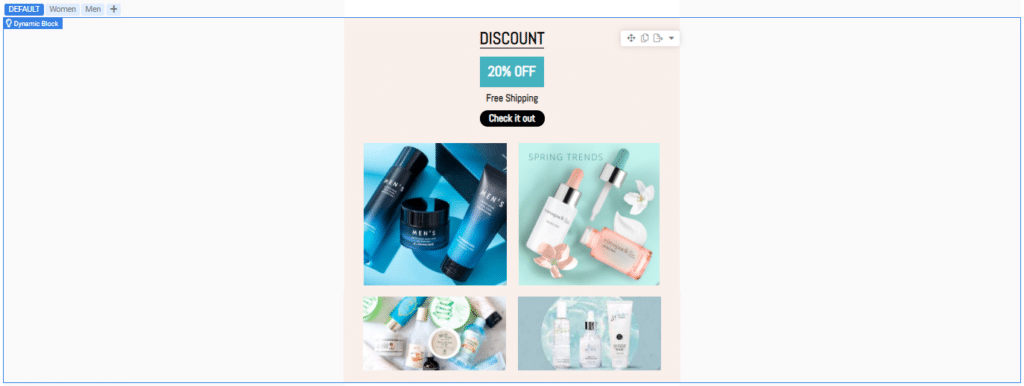
Subscribers that lack information about the type of apparel they are interested in (and thereby do not fall into any of the two segments), will receive content inserted in the “DEFAULT” block. In this example, a combination of the most popular items from both types of apparel is inserted in this block.
Additionally, a feed can be incorporated to allow synchronization with your website to include e.g., newly added items, price changes, etc.
You can insert a Feed Block the same way as Dynamic Block, by clicking on the grid options menu and selecting Feed Block. In case you want to remove your Dynamic/Feed Block, just click on “Remove Intelligence” in the Dynamic/Feed Block options menu (see the image below).

To read more about Feeds, please refer to Feed articles.


