When setting up Tracking on your website there are a few requirements to be met, and based on your website we will be able to track the behavior of your visitors to various extents.
We categorize websites into three different categories.
- Standard systems like native WooCommerce or Adobe Commerce
- Standard systems as above, but with custom plugins installed in key areas
- Custom systems or systems that are unknown to us.
We will be able to natively track all of the pages your visitors visit in all three categories. Events such as adding and removing products from baskets will vary depending on your system.
The guide below is for Standard systems such as native WooCommerce or Adobe Commerce (Magento) 1.9 or 2.0 installations.
By the end of this guide, you will have set up Tracking and synchronization to handle the following
Contact Data
- Flat data such as name, birthday, permission
- Deep transactional data
Events
- Page visited
- Product visited
- Category visited
- Product/category added to cart
- Product/category removed from cart
- Product/category bought
Step 1. Create Product Feed and Sitemap
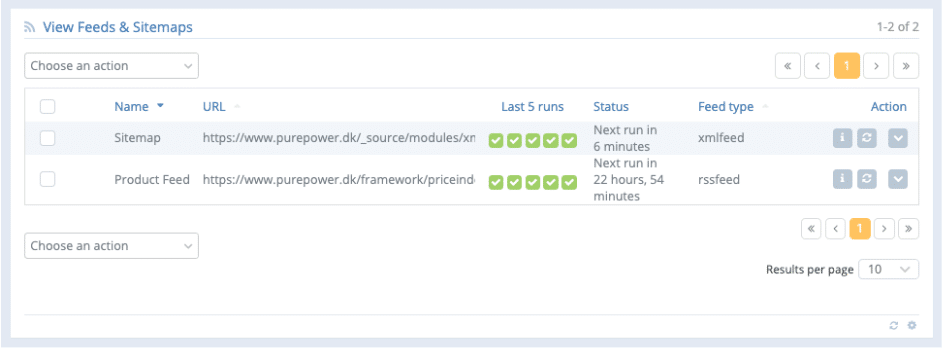
First off you will have to add your Product Feed and the Sitemap to your webshop. This is a requirement since the very heart of Tracking requires us to know your Products and pages in order to record who has visited what.
In-depth details about setting up Feeds and Sitemaps can be found here (link to setup of Feeds and Sitemaps).
Step 2. Setup Tracking
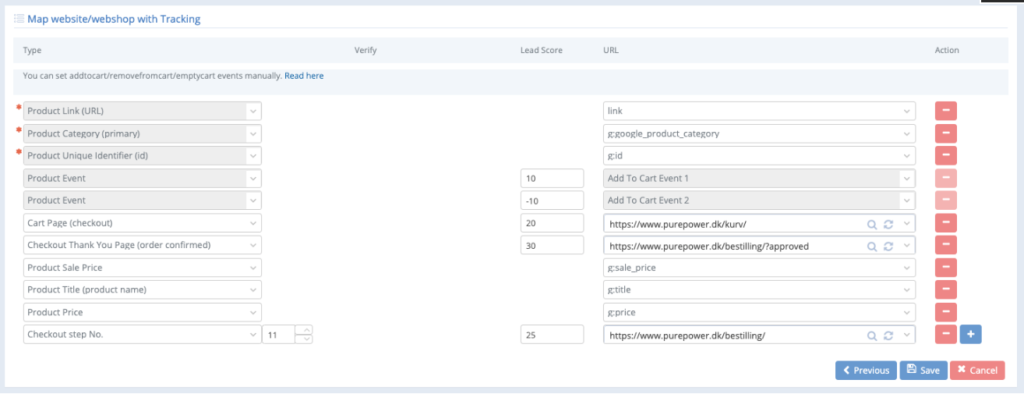
With the Product Feed and Sitemap added we can now set up the Tracking. In the Tracking, you are able to tell us which element in your Product Feed is the Category, Product ID, Sales Price, etc. This will be used in Segments and bridging the Tracking information with the Order data saved in One-to-Many empowering you to target Contacts who have or have not bought, have visited but not bought, etc. from a specific Product Category, Price range, etc.
We will guide you through the mapping and the system will automatically detect if you are using a known system such as SmartWeb, WooCommerce, Adobe Commerce, etc.
Click yes to automatic mapping and you will have the Product Events automatically mapped. If we do not detect your webshop you will have to map this manually.
In order to be empowered with the full potential of the benefits of Tracking it is required to map at least the following:
- Product Events
- Product Link
- Product Category
- Product ID
- Cart Page
- Checkout
- Thank You Page.
It is advised to map more, but not required.
The visitors’ journey…
..and the congruence between Sitemap, Website, and Product Feed.
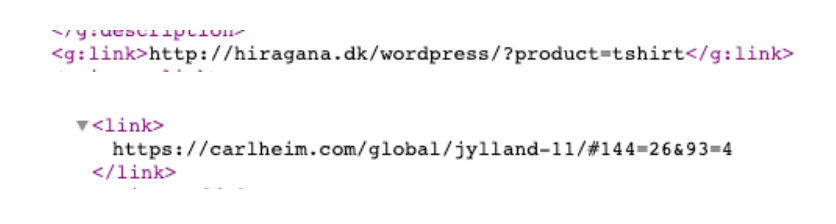
For us to combine the knowledge of which products have been browsed and added to the cart there are two important elements in the product feeds that bind the Sitemap and webshop together.
- Product link. When a customer is visiting a site, we are checking the mapped “Product Link (URL)” and find the product he visited. From that we can see the product id and thereby the category, price etc for the product he visited. It is important that the mapped element for “Product Link (URL)” contains the link in a format shown below
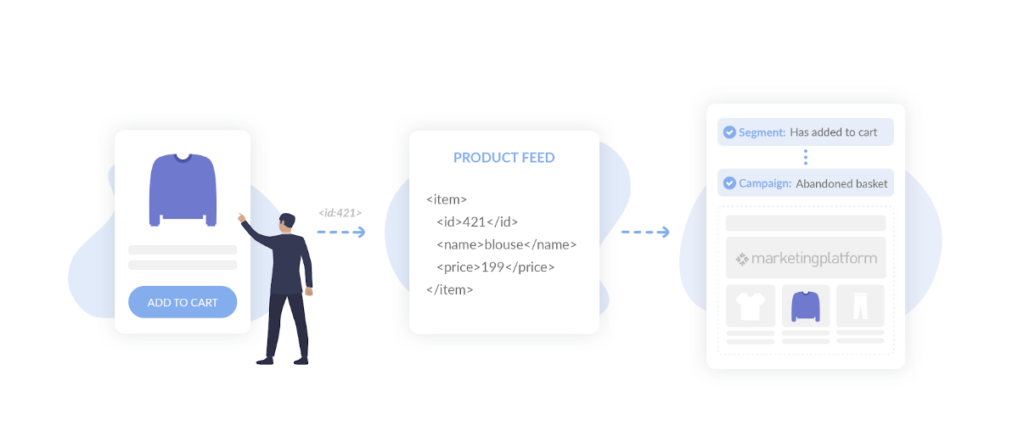
2. Product Unique Identifier (id). When a product is added to the cart it is not visible in the URL alone, and there are many ways for the customer to add an item to the cart without being on the product page itself (search results, main pages with a list of products and an add-to-cart option, etc.).
Most webshops are saying that a specific product id has been added to the basket. For the standard systems we know what that looks like, so all you need to do is to map the “Product Unique Identifier (id) with what is the product id used on the webshop.
It is important that the product ids are the same on the webshop and in the Product Feed – since when the shop is telling us a customer has added Product id “421” to the cart, we will check for product “421” in the Product Feed. If the ids are not the same – there will be no matches found and we will not know which product he added and have nothing to insert in Campaigns or show in Segments.
Step 3 – Setup Connector
The integration part is a few-click procedure. You can also choose the use the API (link) to transfer Contacts and their purchase data to our platform.
To synchronize Contacts and order data between your webshop and MarketingPlatform you go to the Connector page and select your system.
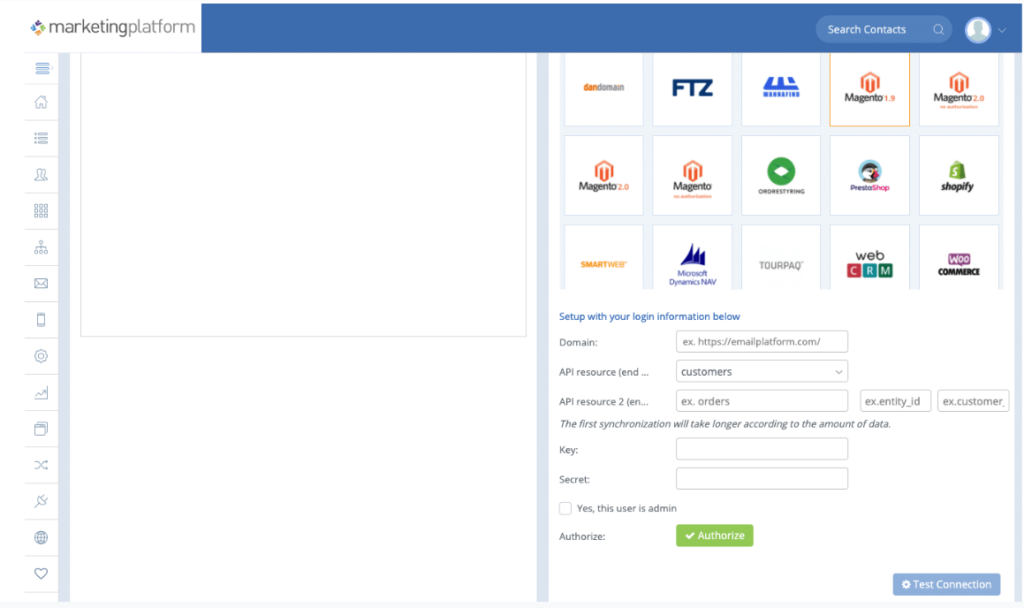
You are then required to insert a few details such as API key depending on your system.
Once connected you can start choosing which data to synchronize.
You can read our general Connector guides (link).
It is advisable to map at least
Product id (required)
Shipping information
Sales price
Permission fields
And any information you want to use for segmentation and mail-merge
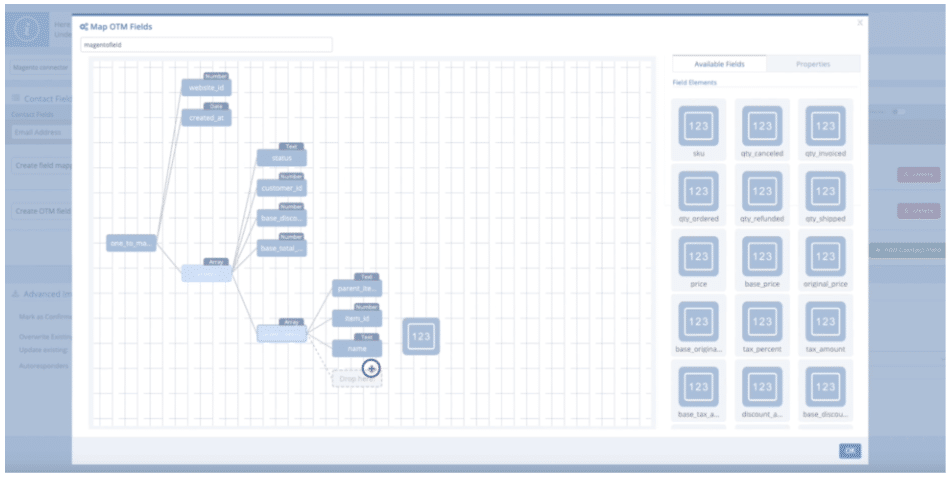
Step 4 – Setup Intelligence
By doing the above setups you have fulfilled all requirements for using the Intelligence function inside of the platform such as AI and intelligent segmentation. You can go to the Intelligence point in the menu (link text to: https://client3.mailmailmail.net/admin/index.php?Page=Intelligence&Action=mapping) and see if you miss any required mapping.

If you have followed the above steps then it is most likely that all you have to do is to edit the One-to-Many field and add the required mapping.
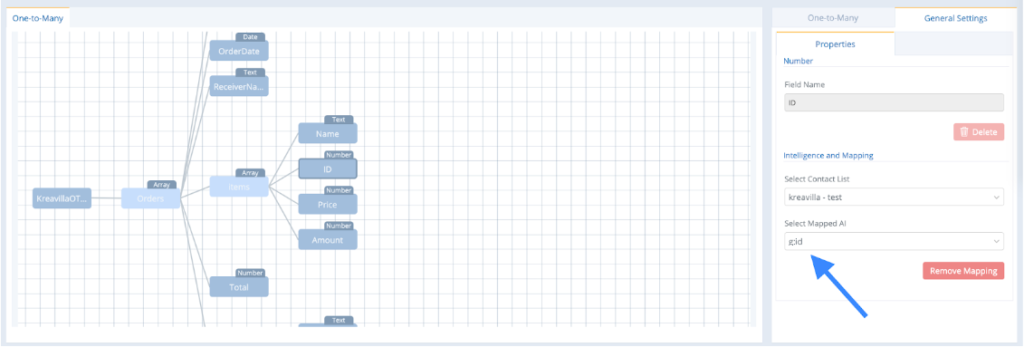
Here you can map which field in your OrderData is the item id, order id, item price, etc. This will be used to bind your order data with your product feed allowing you to create segments such as “Contacts who have bought from x category” etc as well as using AI for predicting product recommendations which you can read more about here.