Expand your output channels with Notifications
With the App integration to Firebase, it is possible to output content as notifications on mobile devices. Do you want to target customers who have not shown activity on your Email Campaigns, send a happy birthday message or offer free shipping for those who have your app installed?
You will find the Notification output under App Integrations in the left-side Menu. We integrate with Firebase to let you segment your Profiles in MarketingPlatform and target them with App Notifications through Firebase. We plan to continue to add more options for integrating MarketingPlatform with your app center.
Get an edge over your competition with Notifications
 Firebase allows you to create a Notification Campaign and target your Profiles that you synchronize between MarketingPlatform and Firebase.
It requires you to use Firebase with your mobile application.
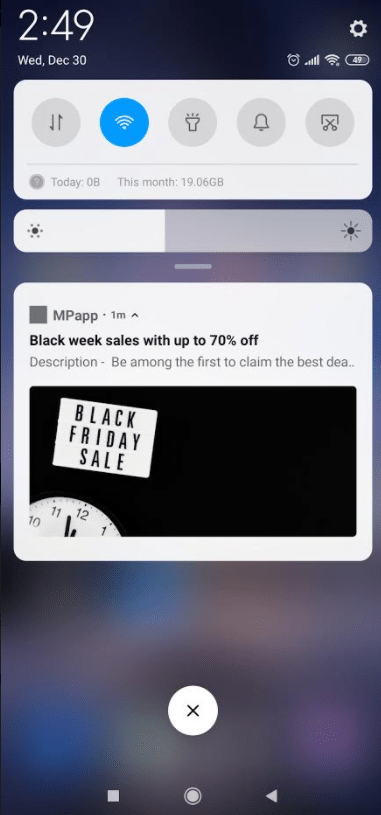
How the notification will look like will depend on the device and notification setting of your customer.
Utilizing Notifications as an output channel is a great way to
• Target inactive Profiles to win them back.
• Reward some of your best customers with targeted messages or if their favorite item is back in stock.
• Get an edge over your competitors on special occasions such as Black Friday by using multiple channels where your competitors might not be present.
All the segmentation can be done in MarketingPlatform based on behavior data we have collected from your website, purchase history with One-to-Many data, email, and SMS Campaigns.
Set up an integration to Firebase with a few clicks with the Connector
In order to send notifications through Firebase it is necessary to set up a Connector to synchronize Profiles between Firebase and MarketingPlatform.

Firebase Connector
All you have to do is to select the Firebase standard Connector and upload your authentication downloaded from Firebase – and we can continue to the mapping of the Data Fields.

One-to-Many Firebase
Here we are mapping the fields in MarketingPlatform with the fields in Firebase. On the left side are the Data Fields you have created in MarketingPlatform. On the right side is the information available from Firebase.
Maybe there are fields with information in Firebase that you do not have in MarketingPlatform? Choose either an existing field in MarketingPlatform – that could be First Name or in case you have not created any Data Field in advance, let us create the field for you.
If you select ‘Create field mapped with name and type from connected system’ then we will take care of creating the Data Field in MarketingPlatform with the correct settings whether it is a text, boolean, date, checkbox field, etc.
Hit the blue ‘One-to-Many’ button in order to map deeper data from Firebase. We need to find the token, which will allow us to send the Notification to each Profile.

Map One-to-Many Firebase
Your screen can look slightly different from what you see above. You can drag’n’drop and adjust the data model in One-to-Many to match your own data model as it is in Firebase – or you can map a few selected fields only. You must however map the ‘token’ and tell us that this field is the token by checking the checkbox you see in the image above. In most cases your field will simply be called ‘token’, and if we detect it we might have checked the checkbox for you already.
Once you are sure the token is mapped. You are free to make any adjustments to the data model as you wish and save the creation of the One-to-Many field and save and exit the Connector setup.
View Notifications

View notifications
View Notifications will give you an overview of your existing Notifications. Here you can see your current Notifications, their internal name in the system, the title the receivers will see, when it was last sent and you have the Actions to send, copy or delete them.
Let us go ahead and create a new Notification
Create Notification

Create Notification
Just like when we create a List, Email Campaign, SMS Campaign, etc. we start off by giving our Notification an internal name. No one except you will see the name – it is solely for internal use.
The first thing the receiver of the notification will see is the Title. The title will typically be bolded and will in most cases be the primary text shown in the collapsed notification and is often limiting you to just a few characters to get your customers’ attention.
The text itself is often shown if there is no need to show a collapsed notification or if the notification is expanded.
It is optional to add an image, which will be shown if your customer’s device supports it and if your app has permission to show notifications with images. How each device will choose to show the notification is not something you can control – and it will heavily be influenced by the customers’ user settings as well as how they prefer to see and receive their notifications across their devices.
How does it look when choosing to send a Notification that we have just created? Let us take a look below …
Send Notifications

Send Notification
When you click Send, we can select our List on the left side, and choose another Notification on our right side.
The only Lists available for choosing will be the Lists where you have a Connector with Firebase – only then do we actually have a connection between your List in MarketingPlatform and your customers in Firebase which will take care of showing the actual notification to your customers’ devices.

Firebase Segmentation
Any information from Firebase can be used in our Segment area. In the above example, you see a simple segment finding all the Profiles with a token making it possible for sending Notifications to them.
You will soon find the ‘Send notification’ option in the FlowBuilder.
