To import contacts to MarketingPlatform, you’ll need to create the list and specific data fields which you’ll be using on the list.
First, you’ll start with the list creation, then data fields creation, and complete the process with the list import.
List Creation
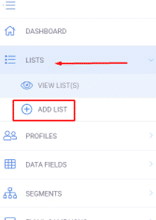
Select the LISTS menu and choose sub-menu ADD LIST.
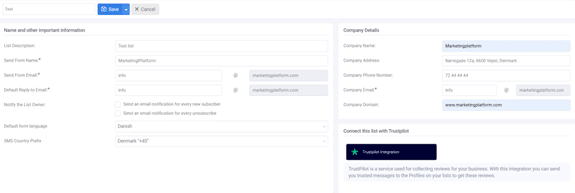
You can give the list a name (e.g., Test List).
Underneath you have the option to enter information about your list.
The fields marked with an asterisk are obligatory, the remaining fields are optional.
- List description – is for your own reference.
- Send from Name – this is the default “From” name and what will be seen by your subscribers when you send a campaign email to them.
- Send From Email – this is the email address that will be used when you send a campaign to this contact list/the email address that will be visible to your recipients.
- Default from language– this option is to define what language you’ll be using.
- SMS Country prefix– you can select an SMS country prefix, depending on the country.
On the right side, you can also enter Company Details. It is mandatory to enter valid company details in this section (including your Company Name, Company Address, Company Email, and preferably your Company Phone Number and Company Domain), due to the fact that some of these details will be replacing placeholders that appear in forms, as well as email and SMS campaigns. Doing this ensures that where these Contact fields appear in your campaigns (for instance in the unsubscribe link, campaign headers or footers, etc.) consistent and correct information will always appear. In case you need to enter your Company domain, please make sure that it always includes “www”.
When creating a list, you must define in advance all data fields relevant to you. Data fields are equivalent to the column names on your files (excel or CSV file). They need to correspond to the data fields from the imported file.
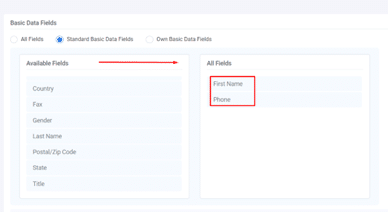
- There are Basic Data Fields defined by default in the platform, and you cannot delete/edit them.
- Own Basic Data Fields are fields created by you.
- All Fields refer to all fields available.
- One-To-many Fields are data fields containing deep data.

Once you have defined all data fields, you’ll need to drag and drop them from left to right. Let’s say your import list will include First Name and Telephone No. Thus, we drag and drop these two fields (email address is mandatory, so we don’t have to drag and drop this field, it will already be on the list).
Data fields creation
If you have other data on your file that is not included, you need to create these data fields additionally.
More info on how to create a data field can be found here.
Once you are done, you’ll need to save the list.
List import
Select Profiles menu and choose the sub-menu Import profiles:
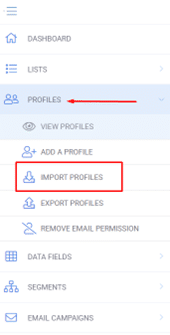
Under IMPORT PROFILES we can import multiple Profiles to the created list using CSV or Excel file.
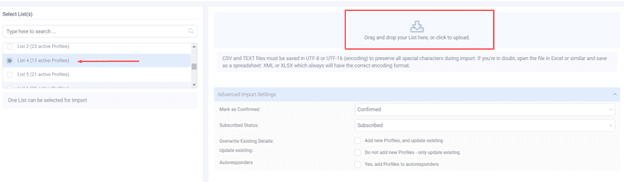
- You’ll need to select the list on which you should import the contacts.
- On the right section by clicking on the marked field you can click to upload the file, or you can drag and drop the file.
- Under Advanced Import Settings, there are options like “Mark as confirmed” where you can tick the option confirm if the client has confirmed their status if however, your contacts are not confirmed then you must choose the unconfirmed status.
NOTE: Any unconfirmed contacts you import we’ll receive a confirmation link email to ensure they are aware of their presence on your Contact List and can then give their informed consent to receive emails from your company.
- You can also choose a status: “Subscribed” or “Unsubscribed”.
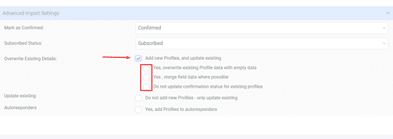
By selecting Add new Profiles and update existing, three sub-options will appear:
- You can overwrite existing profile data with empty data
- Merged field data were possible
- To not update confirmation status for existing profiles
By selecting Do not add new profiles-only update existing is applicable in situations when some changes are made to the existing profiles and by selecting this option, the values will be updated.
The available option too is to not update the confirmation status by selecting Do not update confirmation status for existing profiles.
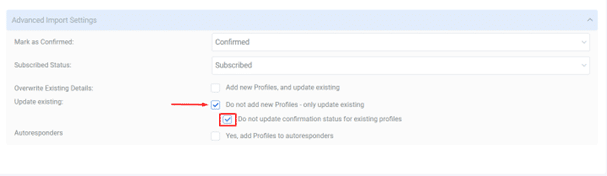
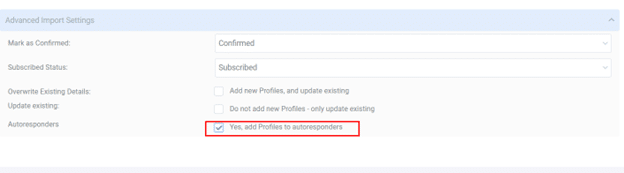
And the profiles can be added to autoresponders, by selecting Yes, add Profiles to autoresponders.
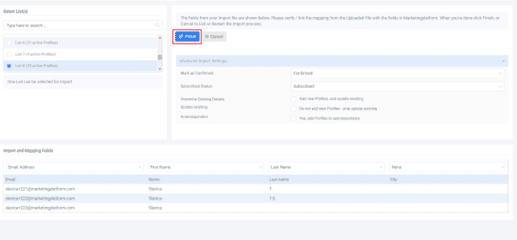
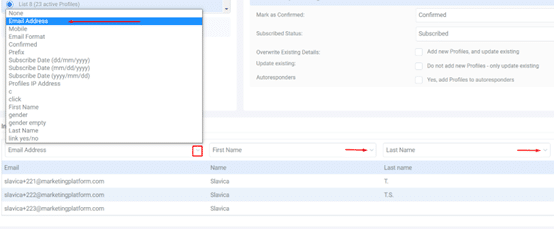
The next step would be to map the fields on the list with the fields on the importing file.
It can be done by using the dropdowns to define which data fields in MarketingPlatform should correspond with which fields in the importing file: Email Address, First Name, etc.
The custom data fields will also appear.
When mapping is completed, you can click on the Finish option to complete and save this process.