How to Integrate clerk.io with MarketingPlatform
It is simple to make integration between clerk.io and MarketingPlatform. Below follows an explanation of the steps. To begin with, you must have set up the integration between your webshop and clerk.io so that the required order data is synchronized back and forth.
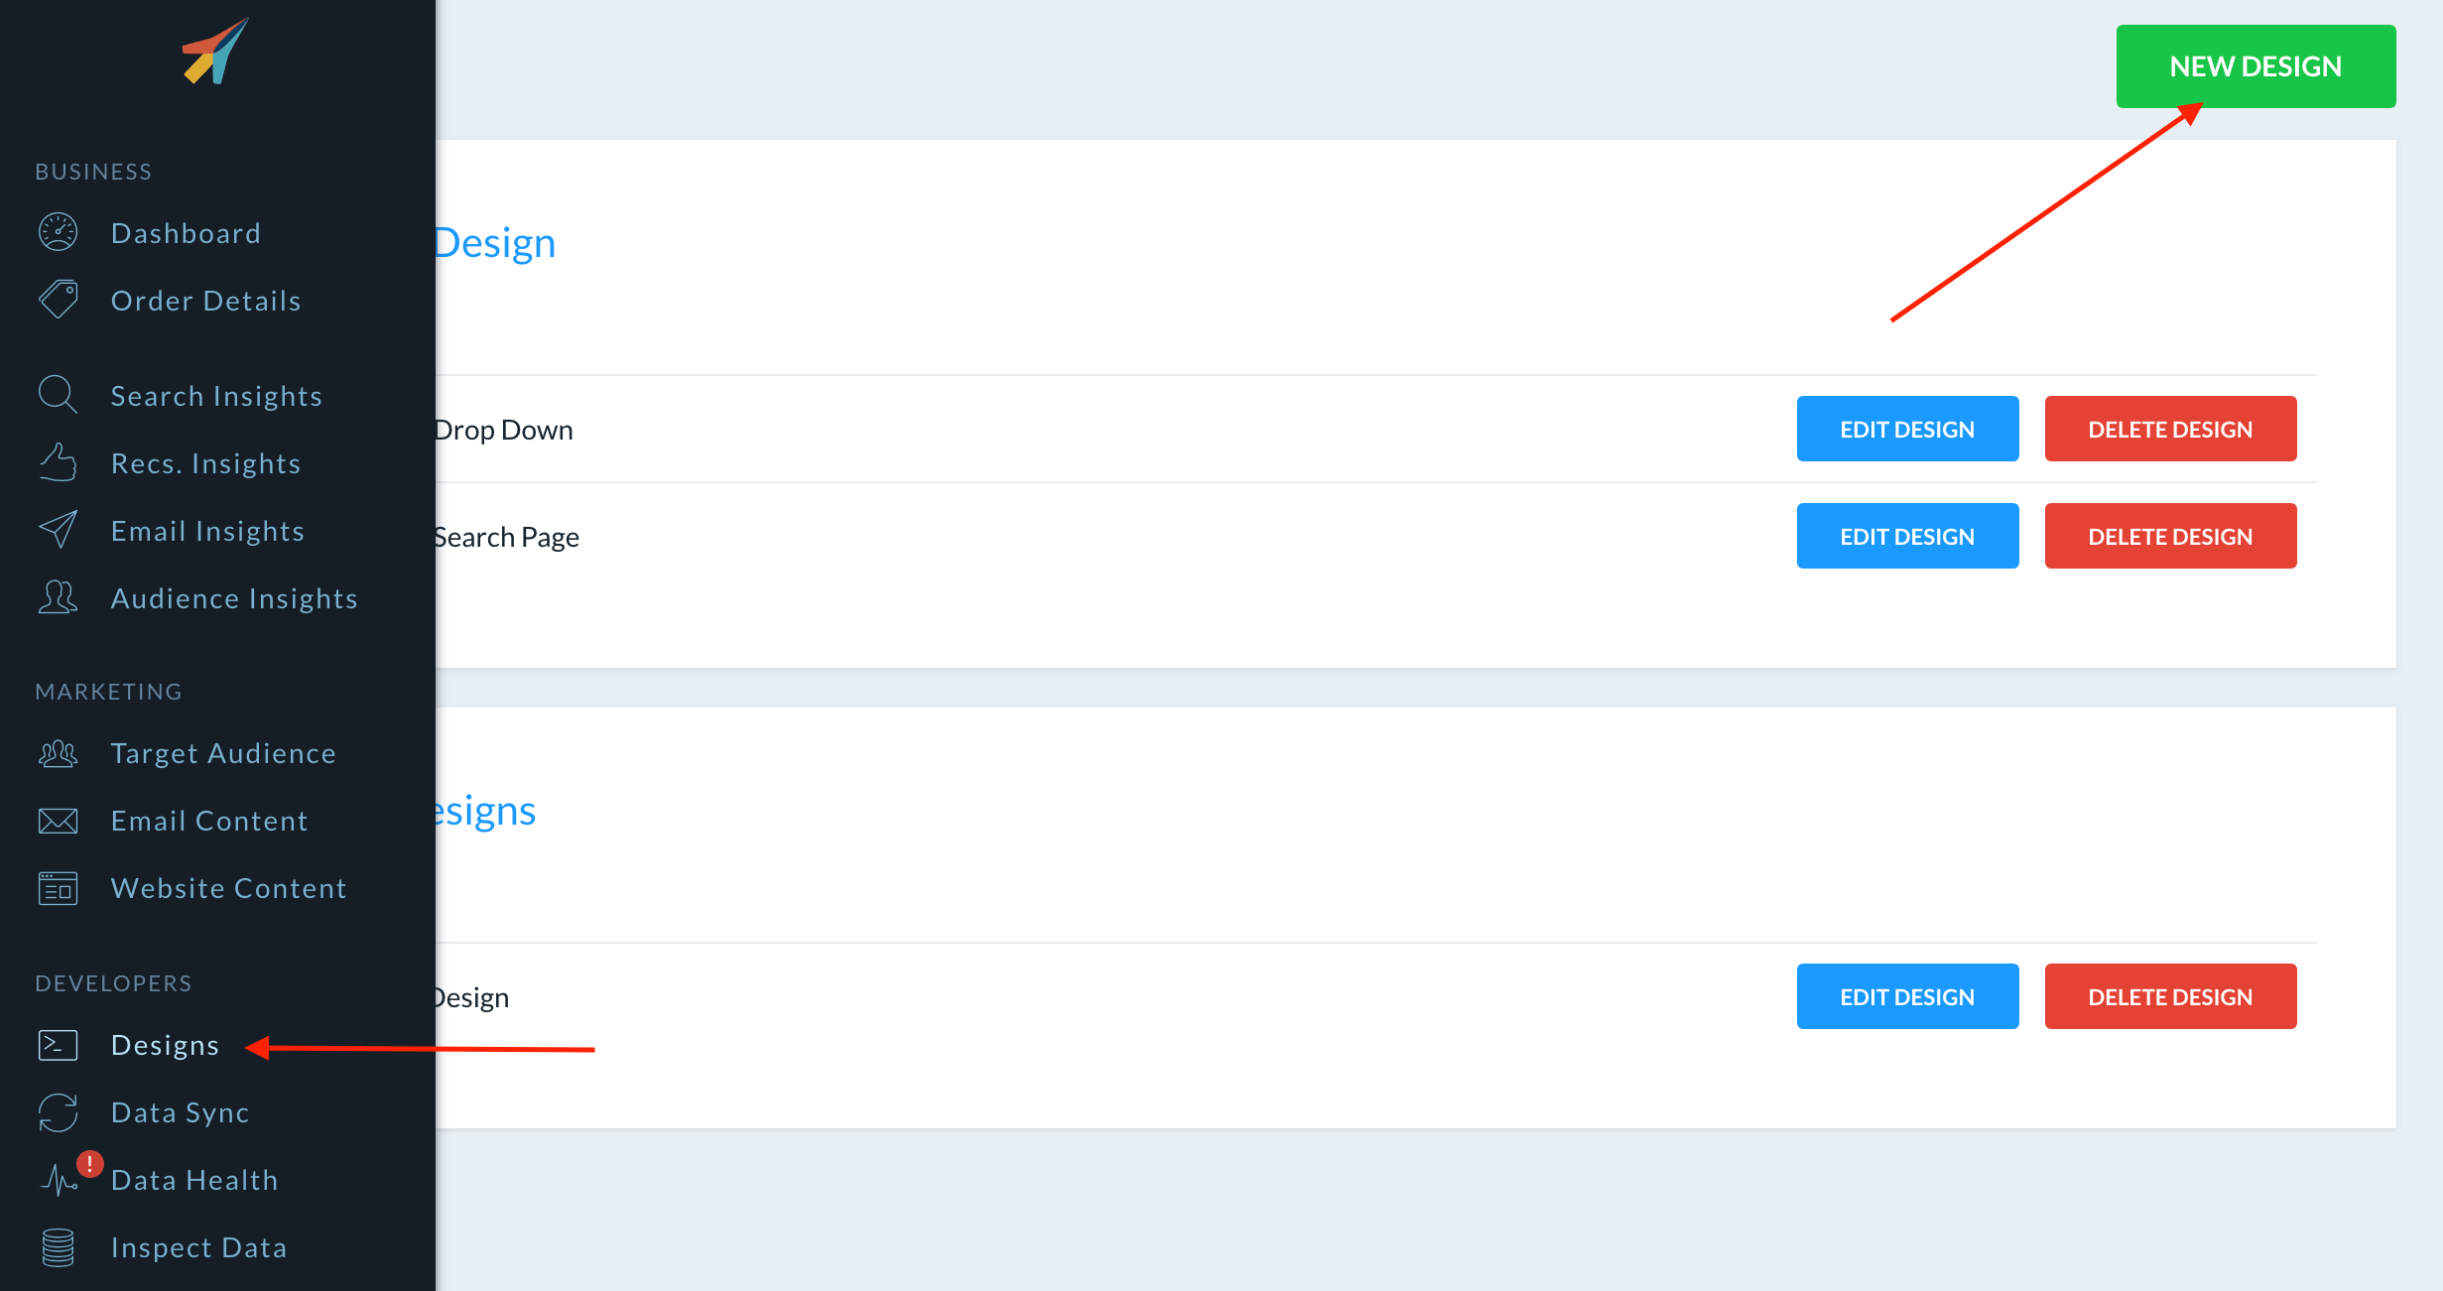
1. Start by creating a design in clerk.io for the email block that will be used in MarketingPlatform. There can be set up several different blocks and designs. Go to the section ‘Designs’ in clerk.io and click on ‘New design’ and name your design.
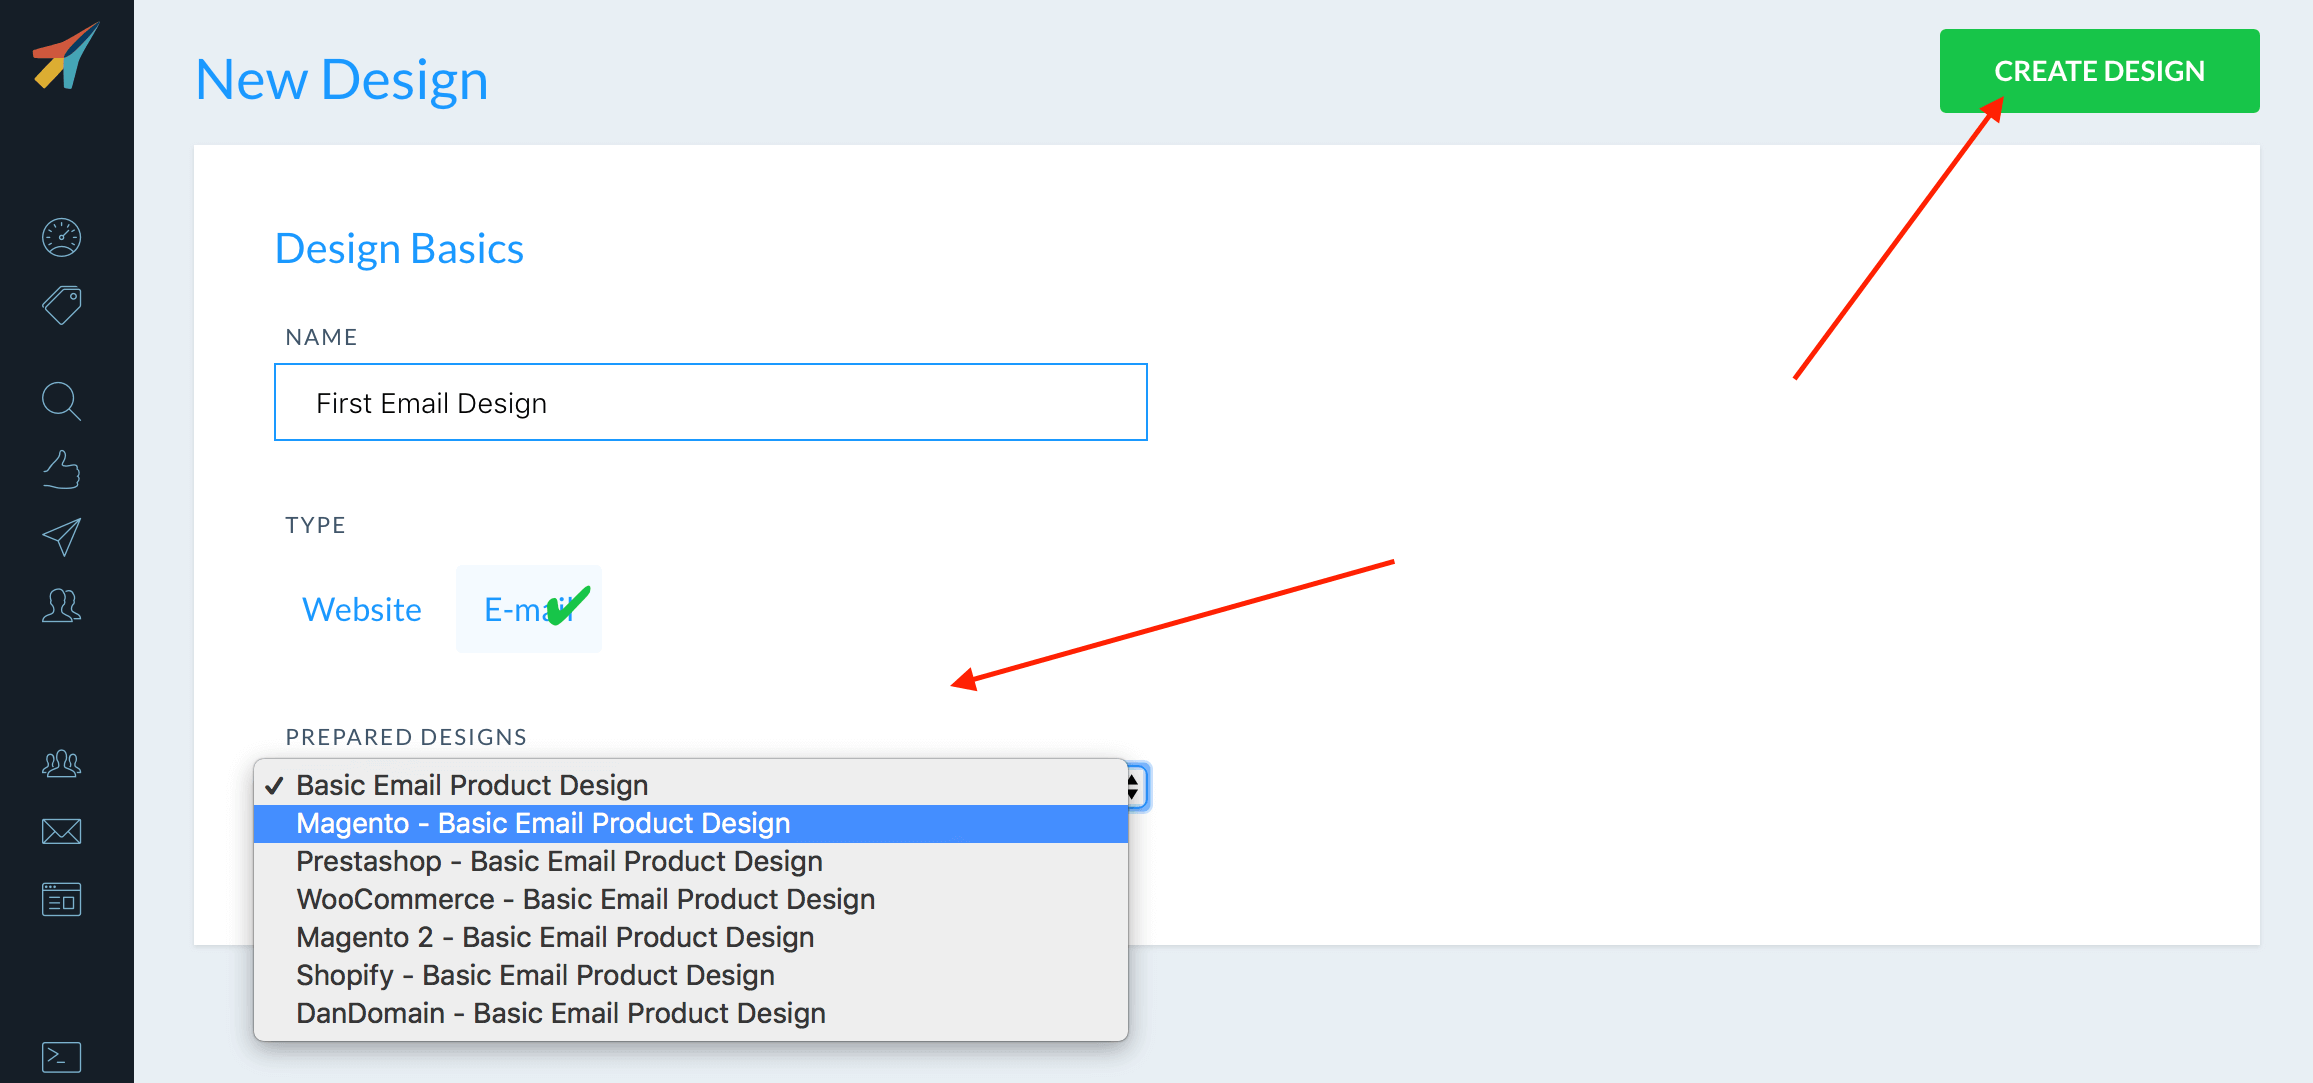
2. Then select ‘Create design’ and choose a design from the list with ‘Prepared designs’.
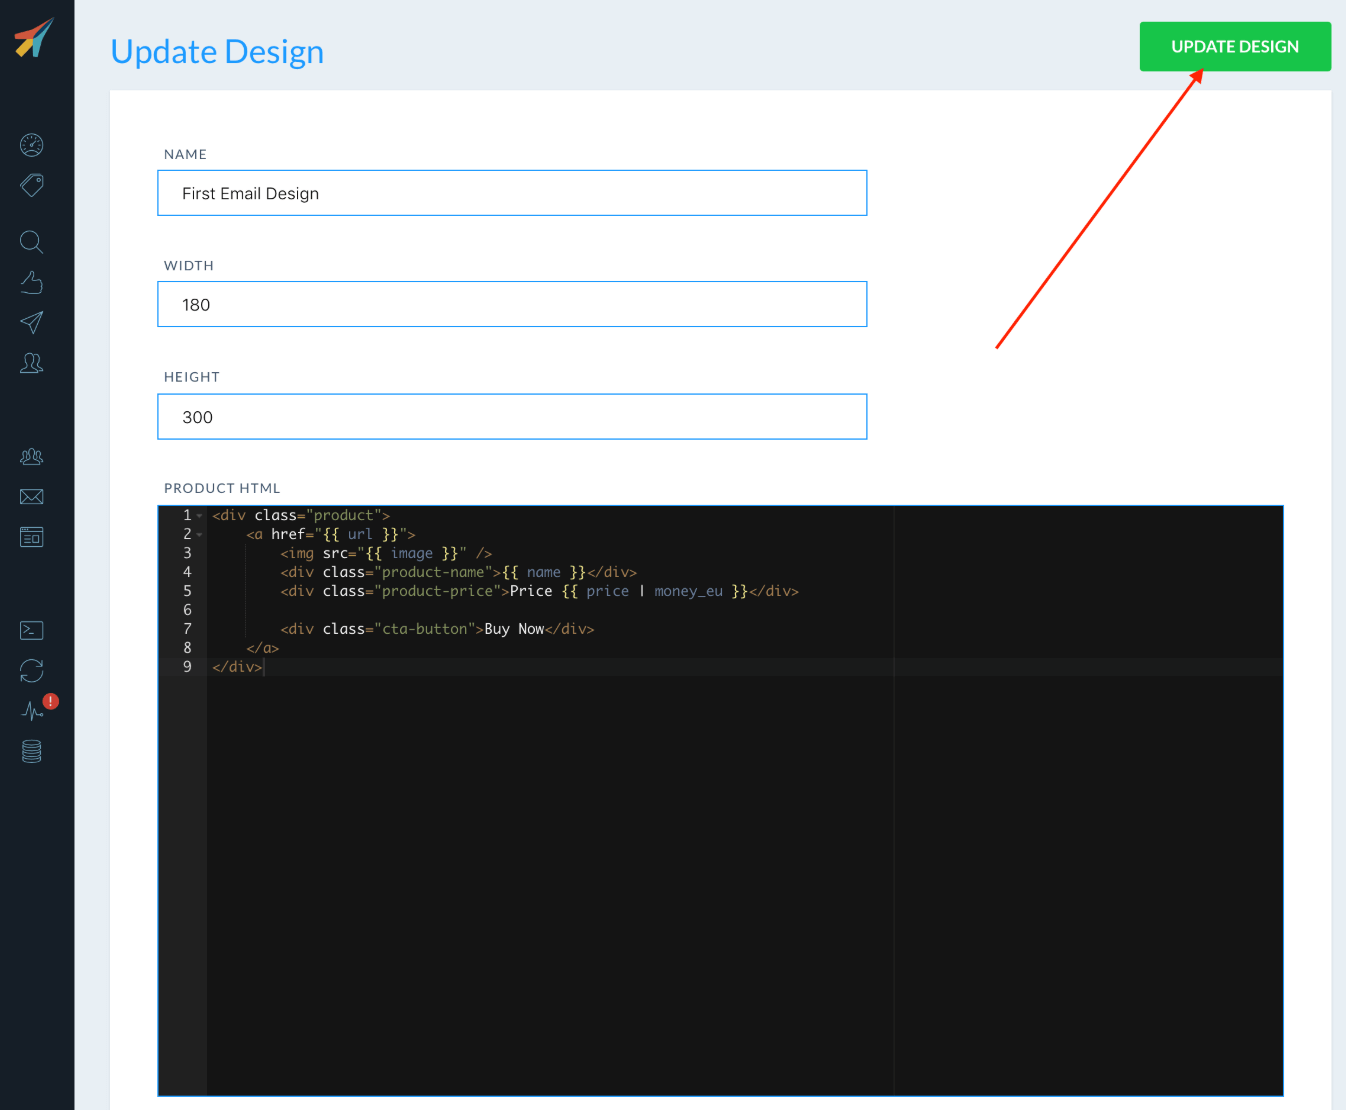
3. If you want to make a more custom design, it is possible to add HTML and CSS code in the email design. Then click ‘Update design’.
4. Create the content of the email. Each type of email product recommendations must have its own content block in clerk.io. These blocks control how many products should be displayed, what logic they need, whether to add filters etc. Go to ‘Email Content’ and then click on ‘New Content’ and name the content.
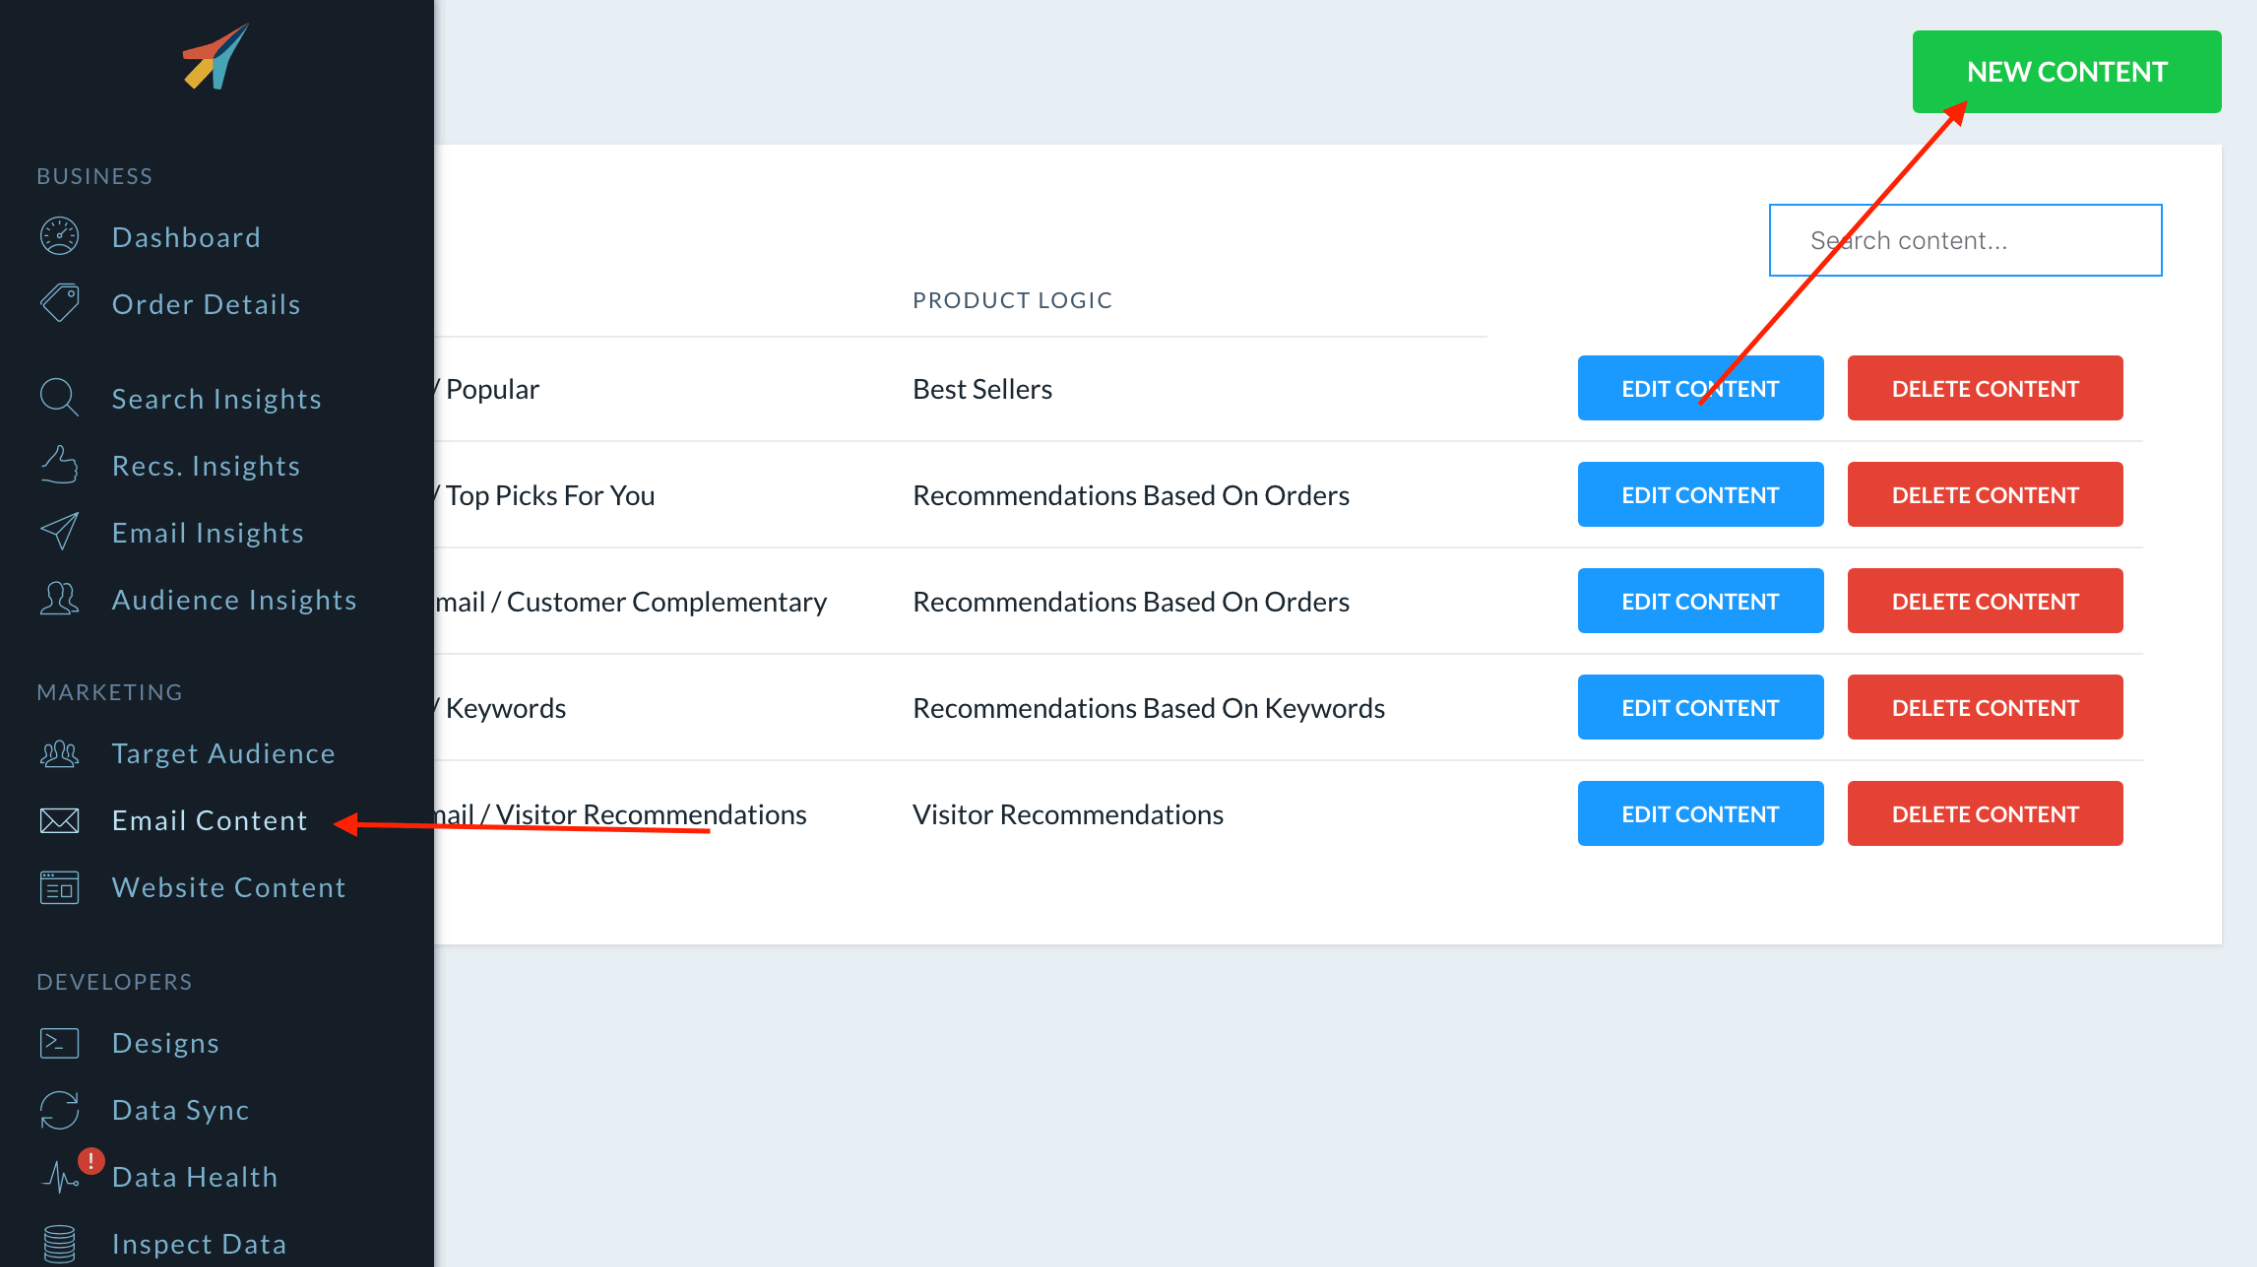
5. Specify the product logic that should be used in the email block. For example, whether the products in the block should show best sellers, hot products, visitor recommendations or other.

6. Choose how many products should be shown in the email block and choose one of the designs that you have created.
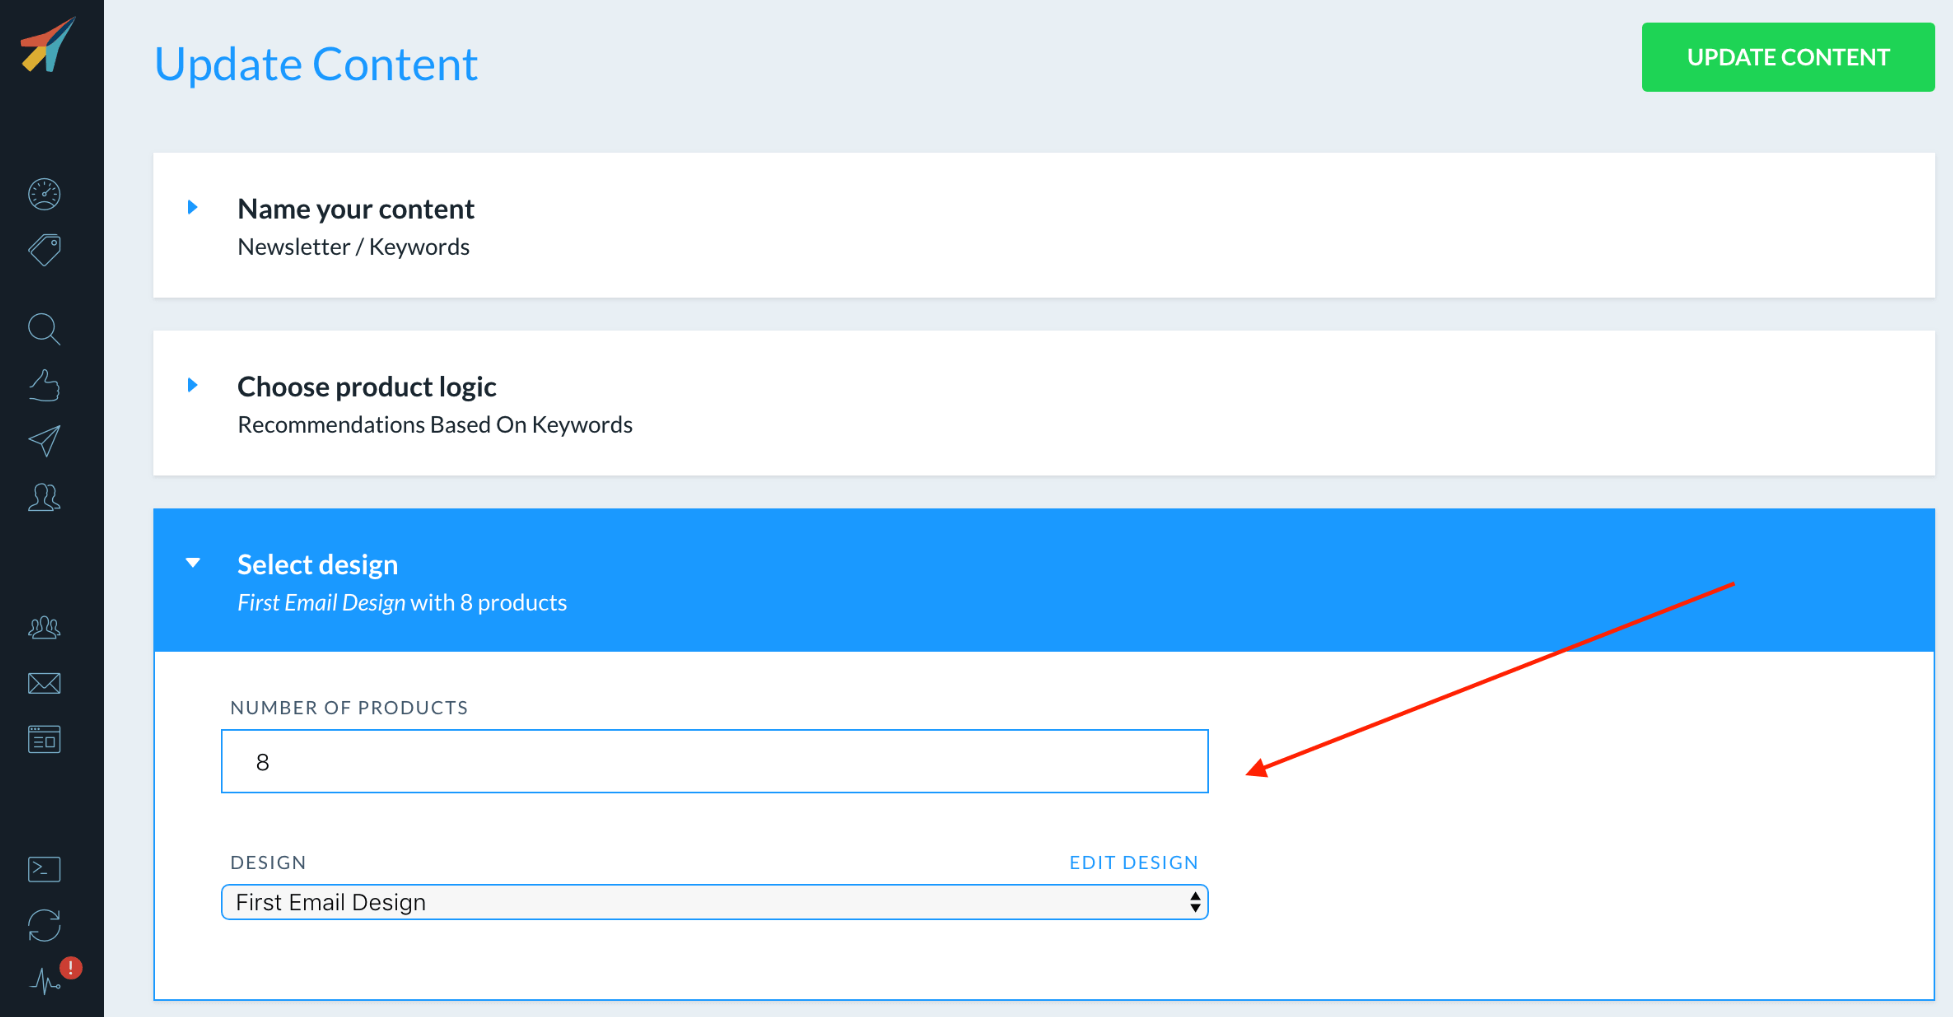
7. Then click on ‘Update Content’ to see the changes.
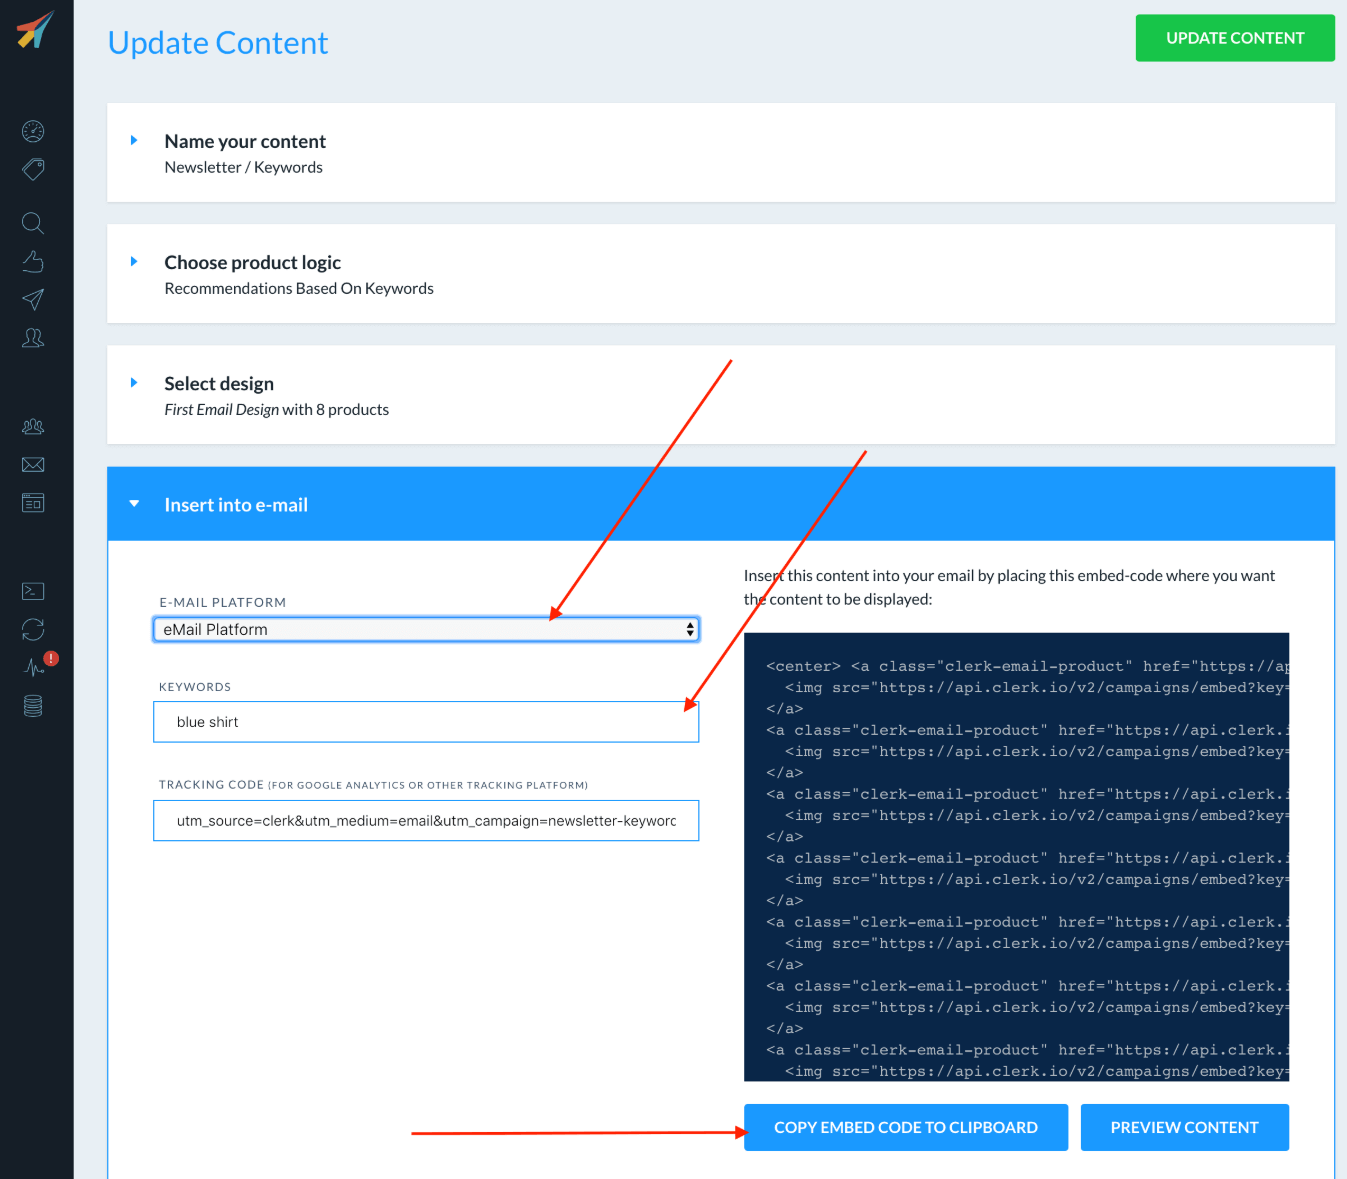
8. You must now download the code that forms the basis for the email block. Go to the ‘Insert into email’ section and choose ‘MarketingPlatform’ as email platform. It is possible that additional data such as keyword and category UD must be added depending on the logic (discussed further up i the document) that is chosen.
9. Click on ‘Copy Embed Code To Clipboard’ on the Content page.
10. You must now have inserted the code into MarketingPlatform. Log in to MarketingPlatform and go to Email Campaigns -> View Campaigns. Then select the email campaign where the code should be inserted in.
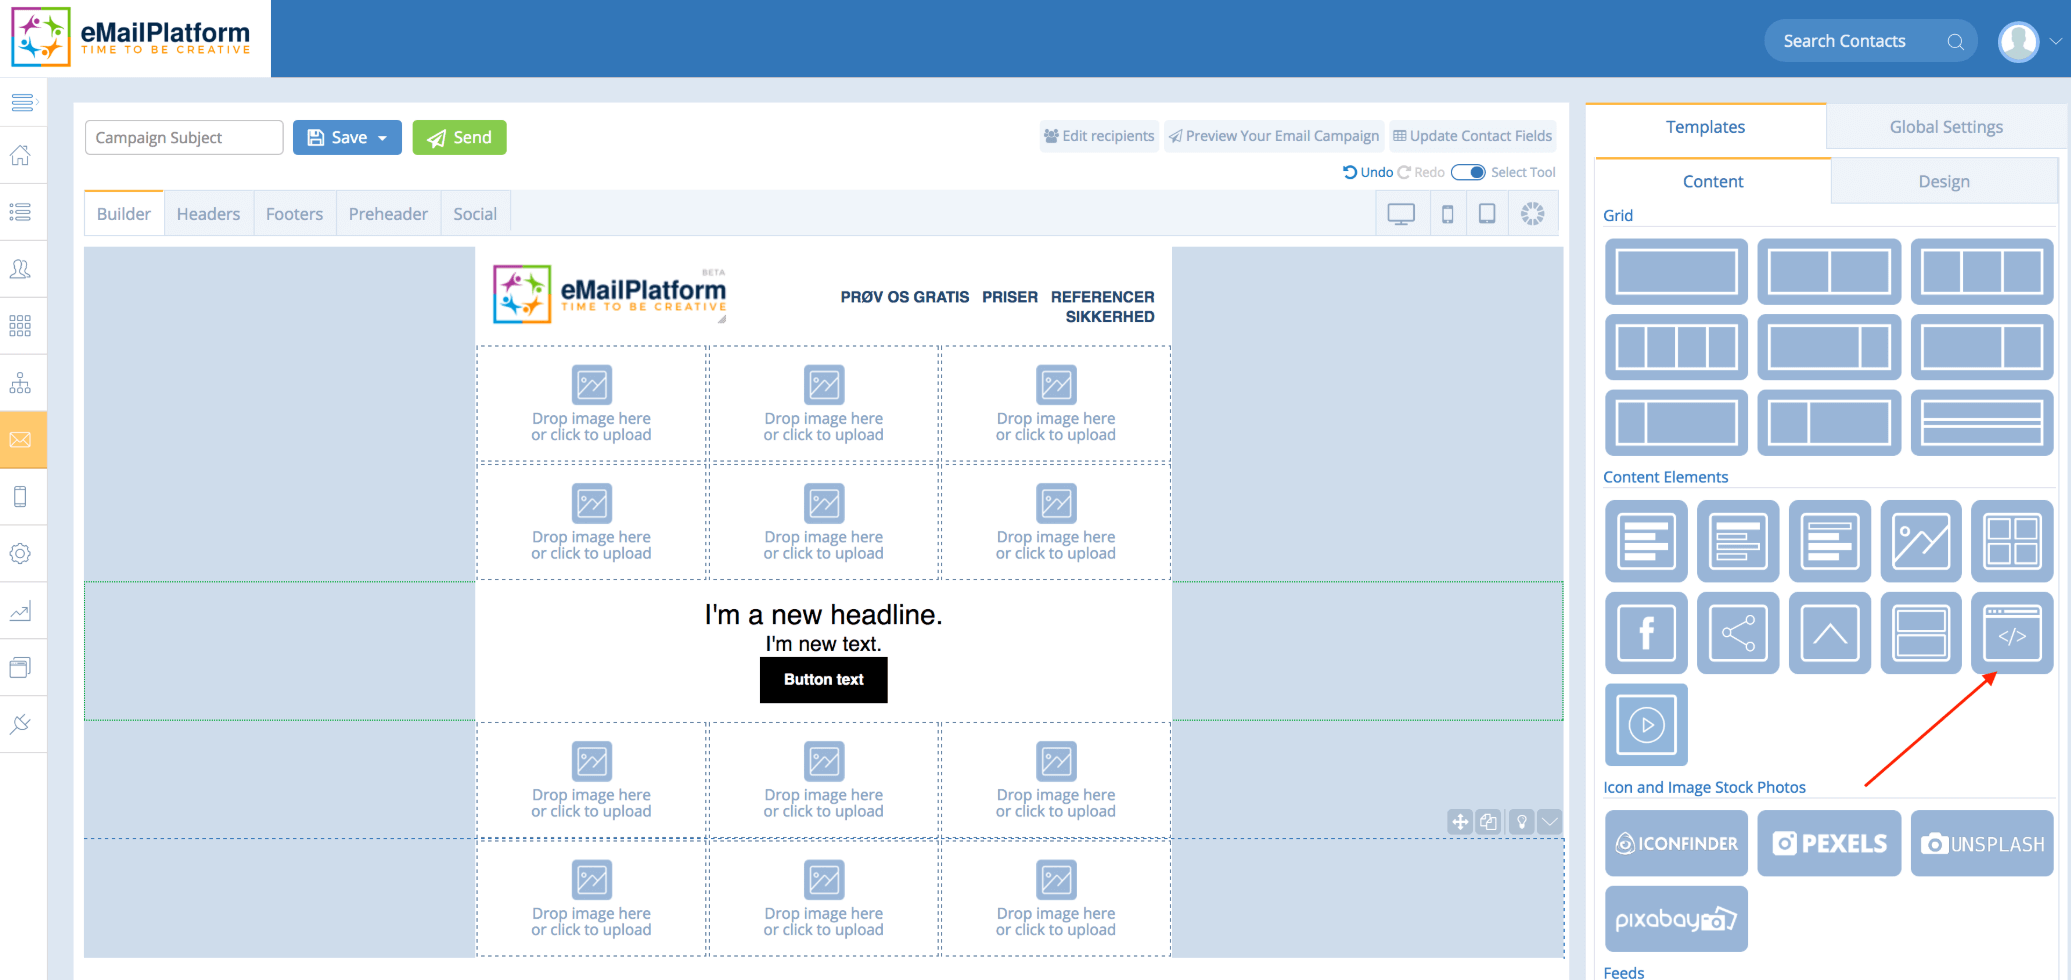
11. Drag an HTML block into your email campaign where you will place the clerk.io block and insert the copied code.
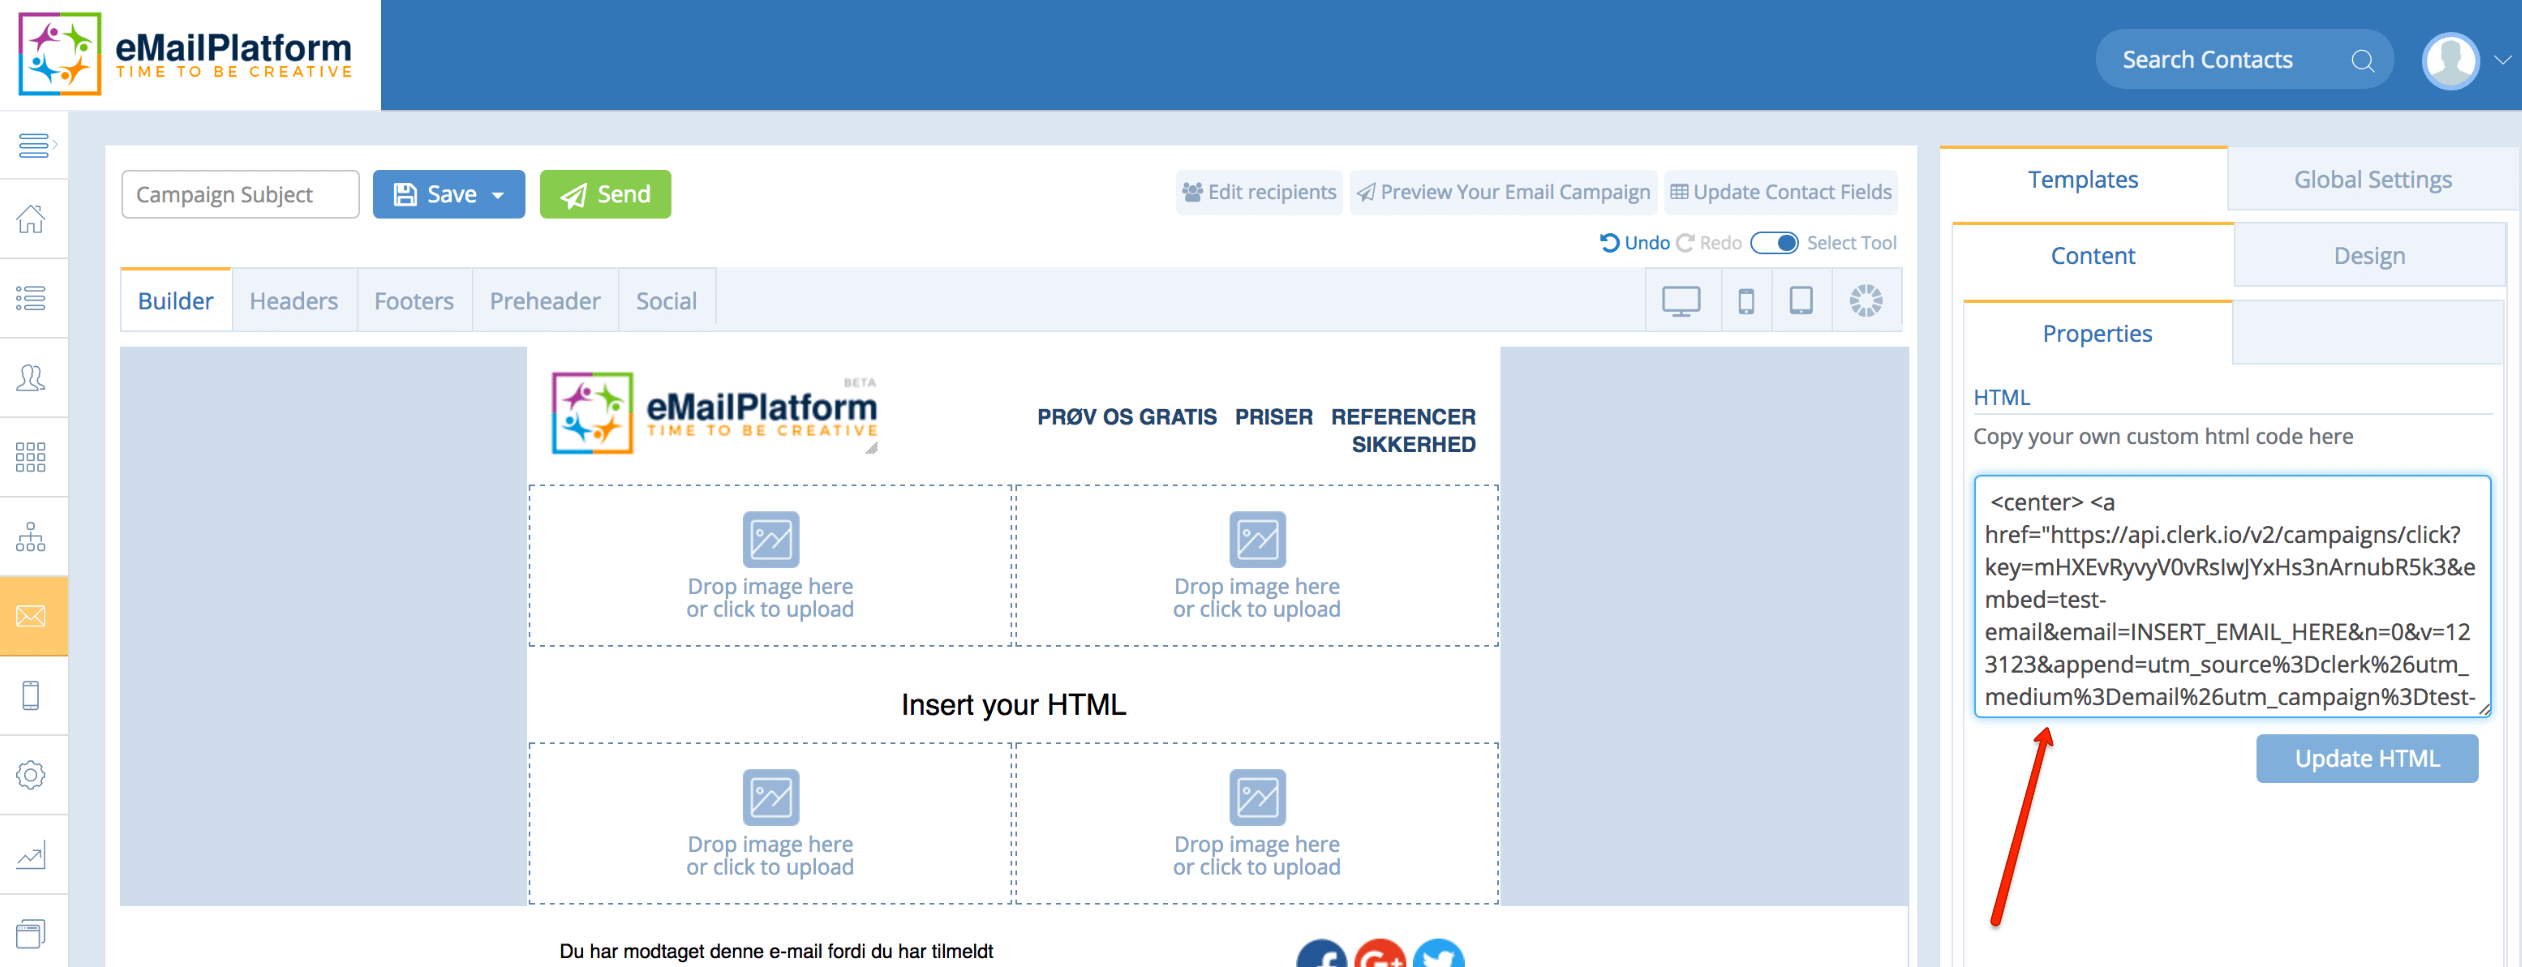
You have now set up integration between clerk.io and MarketingPlatform.
Try MarketingPlatform for free for 14 days
The trial period is free, completely non-binding and expires after 14 days if you do not wish to continue.
When you sign up, you will also receive our educational flow via a series of emails along with our newsletter with regular updates.